Speaker component (object)
| image.png |
Asker behavior (object)
| Asker dialogue creative guide graphic.png |
| Indicator (object text), toggled on and off with Actor Property Switcher behaviour | GM 0.10 actor property beh visiblity of indicator UI.gif |
Crowd Event (object)
| gm UI Crowd Event start.png |
| Objectives - New quest name appears in a temporary banner (fixed duration) | GM UI new quest banner.png |
Objectives UI - Quest descriptions (right)
| GM UI quest UI.png |
| Game Rules - Game Screen rule (display a short text variable in the banner for a custom duration) | GM UI banner.png |
| Game Rules - Game Screen (display a medium title and long text in the body) | GM UI popup.png |
Game Rules - Game Screen slot names and variable values
| GM UI hud slot variable types.png |
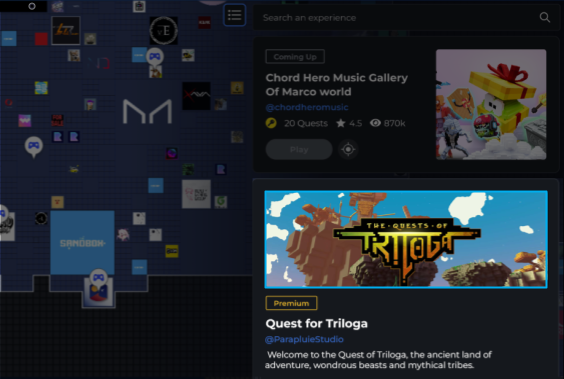
| Gameplay Experience title and description | GM welcome screen example.png |
| banner map premium card listing.png |
| Share an Experience in the Game Maker Gallery | GM shared experience gallery card.png |
| Game Client & Game Maker UI | Software UI is only available in English (e.g., menus) at this time. |
| Text Fields (Dialogue, Quests, Popups, etc) | Information creators enter into text fields: |
| Tags | Description | Example |
|---|---|---|
| <b> </b> | bold | This is <b>bold</b> text. |
| <i> </i> | italics | This is <i>italicised</i> text. |
| <size> </size> | Sets the size in pixels | This is <size=50>larger</size> text. |
| <color> </color> | Sets the colour of the text using colour names (see below) or Hex Codes #rrggbbaa where: r is red g is green b is blue a is alpha (transparency) Note that the tag is spelled "color" | This is <color=#FF0000FF>red</color> text. |
| INPUT | OUTPUT |
|---|---|
| This is <b><i>bold and italicised</i></b> text. | This is bold and italicised text. |
| <color=#FF0000FF>This sentence is red and these words are <b>bold and red</b></color>. | This sentence is red and these words are bold and red. |
aqua /
cyan
fuchsia /
magenta
 | |
 | |
 |
| Linear (Narrative) Players must complete all quests in a specific order to progress a story or flow |
| Branching (Replay value) Players choose which optional quests to trigger, for a more open world feel |
| Both Linear & Branching Players unlock optional side quests or "quest lines" (choose your own adventure) |
 `Collectable` component (Global = TRUE)\
 `Trigger Volume` (destroy this object after one use)\
  `Button` (destroy this object after one use or spawn a
  `Speaker` to inform players that they weren't first)\
 `Asker` (Only once = TRUE or apply
`Speaker` to inform players that they weren't first)\
 `Asker` (Only once = TRUE or apply  `Toggle` to turn off after one use)
2. \[MP]
`Toggle` to turn off after one use)
2. \[MP]  `Message Broadcaster` (Broadcast only once = TRUE if trigger in step 1 can't be removed or prevented)
3.
`Message Broadcaster` (Broadcast only once = TRUE if trigger in step 1 can't be removed or prevented)
3.  `Objectives`
{% hint style="success" %}
**Use Cases**
* Quests with rewards or incentives
* Special roles, side-quests, or branching narrative options
{% endhint %}
***
#### Every Player (Self-Paced)
1. \[MP] trigger (options):\ `Collectable` (Global = FALSE)\ `Trigger Volume`\ `Button`\
 `Asker`
2. `Objectives`
{% hint style="success" %}
**Use Cases (gameplay without rules criteria)**
* Social hub quests
* Competitive solo narrative questing
* Side quests any player can complete
{% endhint %}
{% endtab %}
{% tab title="Include a Rules Criteria (Player variable)" %}
{% hint style="info" %}
A correctly triggered chain of logic including rules that involve a player variable will send the player source data needed by the Objectives system.
{% endhint %}
#### One Player: Player Variable Value
1. \[MP] trigger (options):\ `Collectable` (Global = TRUE)\ `Trigger Volume` (destroy this object after one use)\ `Button` (destroy this object after one use or spawn a `Speaker` to inform players that they weren't first)\
 `Asker` (Only once = TRUE or apply `Toggle` to turn off after one use)
2.
`Objectives`
{% hint style="success" %}
**Use Cases**
* Quests with rewards or incentives
* Special roles, side-quests, or branching narrative options
{% endhint %}
***
#### Every Player (Self-Paced)
1. \[MP] trigger (options):\ `Collectable` (Global = FALSE)\ `Trigger Volume`\ `Button`\
 `Asker`
2. `Objectives`
{% hint style="success" %}
**Use Cases (gameplay without rules criteria)**
* Social hub quests
* Competitive solo narrative questing
* Side quests any player can complete
{% endhint %}
{% endtab %}
{% tab title="Include a Rules Criteria (Player variable)" %}
{% hint style="info" %}
A correctly triggered chain of logic including rules that involve a player variable will send the player source data needed by the Objectives system.
{% endhint %}
#### One Player: Player Variable Value
1. \[MP] trigger (options):\ `Collectable` (Global = TRUE)\ `Trigger Volume` (destroy this object after one use)\ `Button` (destroy this object after one use or spawn a `Speaker` to inform players that they weren't first)\
 `Asker` (Only once = TRUE or apply `Toggle` to turn off after one use)
2.  `Rules` (**player variable** used as a criteria to send a message)
3. \[MP] `Message Broadcaster` (Broadcast only once = TRUE or apply `Toggle` to turn off after one use)
4. `Objectives`
{% hint style="success" %}
**Use Cases**
* MVP quest after earning the top time, score, etc.
* Tutorial quest for player with the lowest time, score, etc.
{% endhint %}
***
#### Every Player: Player Variable Value (Self-Paced)
1. \[MP] trigger (options): \ `Collectable` (Global = FALSE)\ `Trigger Volume`\ `Button`\
 `Asker`
2. `Rules` (**player variable** as a criteria to send a message)
3. `Objectives`
{% hint style="success" %}
**Use Cases (gameplay with Rules criteria)**
* Social hub quests
* Competitive solo narrative questing
* Side quests any player can complete
{% endhint %}
{% endtab %}
{% endtabs %}
#### Quest Together
{% hint style="warning" %}
The examples below do not use built in features. Since there is a break in logic flow and quests do not trigger at the exact moment, test your design thoroughly to ensure it works consistently. More developments are on the way to make multiplayer quest design easier.
{% endhint %}
{% tabs %}
{% tab title="Global Quest" %}
#### Cooperative: All Players Trigger (Almost) Simultaneously
1. Trigger options:
1. All players enter a location:
1. \[MP] `Trigger Volume` (Detection = EveryAvatarInRange)
2. `Rules` (**global variable** as a criteria to send a message)
1.
`Rules` (**player variable** used as a criteria to send a message)
3. \[MP] `Message Broadcaster` (Broadcast only once = TRUE or apply `Toggle` to turn off after one use)
4. `Objectives`
{% hint style="success" %}
**Use Cases**
* MVP quest after earning the top time, score, etc.
* Tutorial quest for player with the lowest time, score, etc.
{% endhint %}
***
#### Every Player: Player Variable Value (Self-Paced)
1. \[MP] trigger (options): \ `Collectable` (Global = FALSE)\ `Trigger Volume`\ `Button`\
 `Asker`
2. `Rules` (**player variable** as a criteria to send a message)
3. `Objectives`
{% hint style="success" %}
**Use Cases (gameplay with Rules criteria)**
* Social hub quests
* Competitive solo narrative questing
* Side quests any player can complete
{% endhint %}
{% endtab %}
{% endtabs %}
#### Quest Together
{% hint style="warning" %}
The examples below do not use built in features. Since there is a break in logic flow and quests do not trigger at the exact moment, test your design thoroughly to ensure it works consistently. More developments are on the way to make multiplayer quest design easier.
{% endhint %}
{% tabs %}
{% tab title="Global Quest" %}
#### Cooperative: All Players Trigger (Almost) Simultaneously
1. Trigger options:
1. All players enter a location:
1. \[MP] `Trigger Volume` (Detection = EveryAvatarInRange)
2. `Rules` (**global variable** as a criteria to send a message)
1.  `Asset Spawner` spawns \[MP] `Trigger Volume` (Detection = EveryAvatarInRange)
2. `Objectives`
{% hint style="success" %}
**Use Cases**
* Cooperative Escape Room, etc.
* Players vs Enemy quests (PVE)
{% endhint %}
***
#### Collaborative Play Without Quests
{% hint style="success" %}
If you're new to creating multiplayer Experiences, try adding a collaborative goal with [Crowd Event](/en/creator/game-maker/docs/behaviours/basic-logic/crowd-event.md) behaviour. It's easier to set up than quests and has its own UI!
{% endhint %}
{% endtab %}
{% tab title="Team Quest" %}
#### Competitive: All Team Members Trigger (Almost) Simultaneously
1. Trigger options:
1. Enter a location:
1. Per team, \[MP] `Trigger Volume` (Detection = TeamInRange, set team name)
2. Rules criteria:
1. `Rules` (**team variable** as a criteria to send a message)
2. Per team, `Send Message` rule (Broadcast = Team, set team name) triggered by which team met the criteria
3. Per team, \[MP] `Asset Spawner` spawns \[MP] `Trigger Volume` (Detection = TeamInRange)
2. `Objectives`
{% hint style="success" %}
**Use Cases**
* Multi-phase gameplay as quests every team may complete
* Secret team missions (e.g., spy games)
* Teams as gameplay roles with unique quests (e.g., RPGs)
* Bonus challenges or rewards for top teams
* Quick tutorials for struggling teams
{% endhint %}
{% endtab %}
{% endtabs %}
### Quest Icons
The [**Objectives**](/en/creator/game-maker/docs/objectives.md) system sets up the structure of quests, which have a beginning, middle, and end. Use the [**Indicator** ](/en/creator/game-maker/docs/components/display/indicator.md)component to set quest icons to appear on objects related to your quest.
{% tabs %}
{% tab title="Giver" %}
#### Giver - Starts the Quest
{% hint style="info" %}
If a quest is set to auto launch, the ***Giver*** icon will not appear.
{% endhint %}
`Asset Spawner` spawns \[MP] `Trigger Volume` (Detection = EveryAvatarInRange)
2. `Objectives`
{% hint style="success" %}
**Use Cases**
* Cooperative Escape Room, etc.
* Players vs Enemy quests (PVE)
{% endhint %}
***
#### Collaborative Play Without Quests
{% hint style="success" %}
If you're new to creating multiplayer Experiences, try adding a collaborative goal with [Crowd Event](/en/creator/game-maker/docs/behaviours/basic-logic/crowd-event.md) behaviour. It's easier to set up than quests and has its own UI!
{% endhint %}
{% endtab %}
{% tab title="Team Quest" %}
#### Competitive: All Team Members Trigger (Almost) Simultaneously
1. Trigger options:
1. Enter a location:
1. Per team, \[MP] `Trigger Volume` (Detection = TeamInRange, set team name)
2. Rules criteria:
1. `Rules` (**team variable** as a criteria to send a message)
2. Per team, `Send Message` rule (Broadcast = Team, set team name) triggered by which team met the criteria
3. Per team, \[MP] `Asset Spawner` spawns \[MP] `Trigger Volume` (Detection = TeamInRange)
2. `Objectives`
{% hint style="success" %}
**Use Cases**
* Multi-phase gameplay as quests every team may complete
* Secret team missions (e.g., spy games)
* Teams as gameplay roles with unique quests (e.g., RPGs)
* Bonus challenges or rewards for top teams
* Quick tutorials for struggling teams
{% endhint %}
{% endtab %}
{% endtabs %}
### Quest Icons
The [**Objectives**](/en/creator/game-maker/docs/objectives.md) system sets up the structure of quests, which have a beginning, middle, and end. Use the [**Indicator** ](/en/creator/game-maker/docs/components/display/indicator.md)component to set quest icons to appear on objects related to your quest.
{% tabs %}
{% tab title="Giver" %}
#### Giver - Starts the Quest
{% hint style="info" %}
If a quest is set to auto launch, the ***Giver*** icon will not appear.
{% endhint %}
| PLAYER ICON - EXCLAMATION MARK |  |
|
| BUILDER SETUP | Objectives - set the quest conditions | Indicator - apply this component to an object
|
| PLAYER ICON - TARGET |  |
|
| BUILDER SETUP | Objectives - set the quest conditions | Indicator - apply this component to one or more objects, which are the condition set in Step 3 of the Quest setup (Quest Type)
|
| PLAYER ICON - QUESTION MARK |  |
|
| BUILDER SETUP | Objectives - set up quest conditions | Indicator - apply this component to an object
|
| "Bark" | The player gets close enough to an NPC to see a Speaker component pop up a box of text. | Note: A "bark" may be used instead of a quest giver. |
| Dialogue - Inform/Hint | One or more Asker behaviours may be set with a question or statement and up to four answers. | Note: Answers can send messages to trigger other Askers. Toggle should be applied to turn Askers on/off when necessary. Don't forget to set the Toggle's initial state for each Asker! |