# Modeler

## Creating Simple Assets (Models)

Voxels are the atoms that make up the world in The Sandbox. Use the Modeler to build simple, static 3D assets. [Upload](/en/creator/voxedit/upload-assets-to-workspaces.md) to use them in [Game Maker](/en/creator/game-maker/create-experiences.md).

{% hint style="info" %}
Simple assets made in the **Modeler** are built in the <mark style="color:red;">**X**</mark>**,&#x20;**<mark style="color:green;">**Y**</mark>**, and&#x20;**<mark style="color:blue;">**Z**</mark>**&#x20;axes**. They may have a "blocky" appearance.
{% endhint %}

You can also rig simple assets together in the [Animator](/en/creator/voxedit/docs/animator.md) to make compound or animated assets.

The Modeler combines <mark style="color:yellow;">**tools**</mark> that are like brush shapes with <mark style="color:yellow;">**modes**</mark> to paint, add, remove, and select voxels. Use the default palette or custom colours. Controls make it easy to visualize your project, create patterns, refine your design, and optimize your workflow.

{% tabs %}
{% tab title="About" %}
{% embed url="<https://youtu.be/200Kj2Dljrg>" %}
{% endtab %}

{% tab title="What Can I Make?" %}

### What Can I Make?

The Modeler can be used to:

* Make a simple asset
* Edit one model at a time from a compound or animated asset in the [Animator](/en/creator/voxedit/docs/animator.md) (integrated)

#### Simple Assets

Simple assets are made in the **Modeler**. They have no animations, but logic can bring them to life.

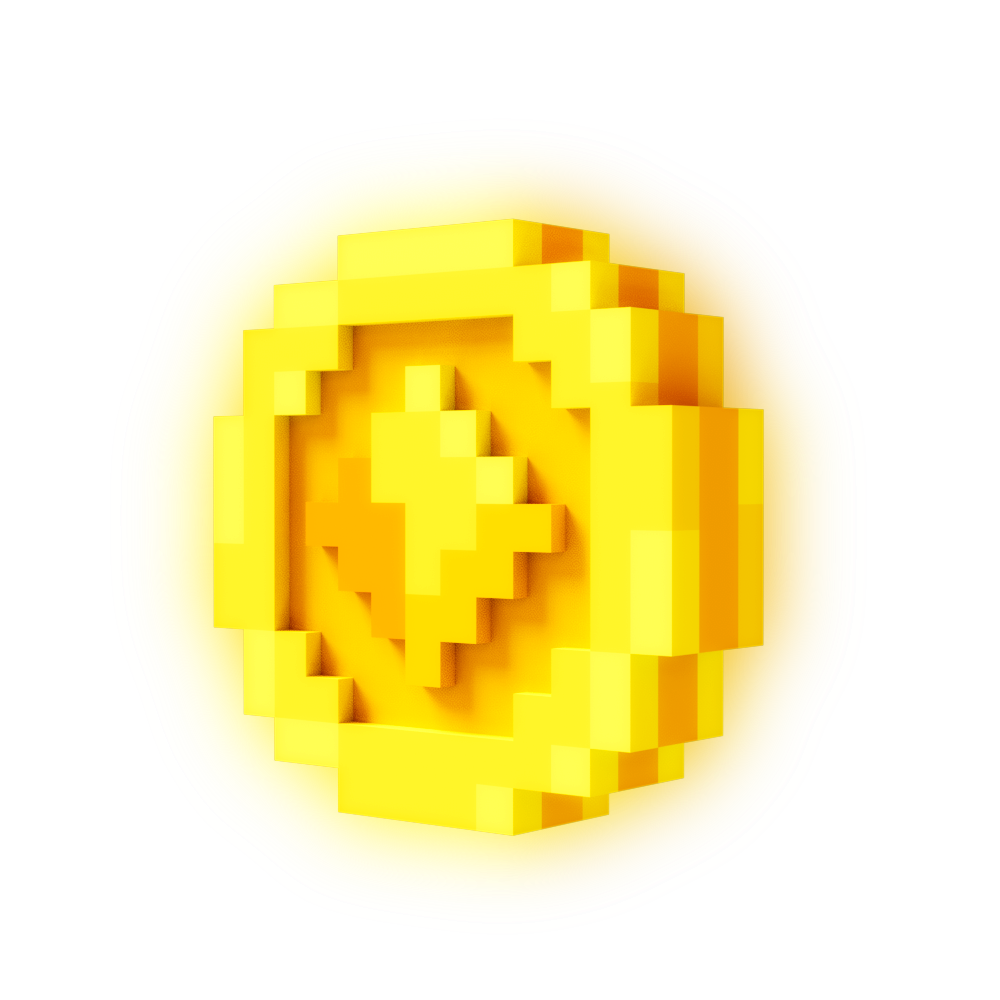
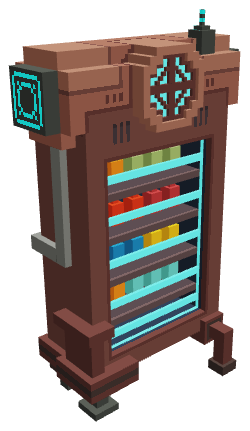
<div><figure><img src="/files/kIwUQemgnxvL8y94elsg" alt="" width="375"><figcaption><p>Pickable objects</p></figcaption></figure> <figure><img src="/files/fy1de6Mi6cSCpJHwDhcR" alt="" width="375"><figcaption><p>Interactive Props</p></figcaption></figure> <figure><img src="/files/TpzPczz3usGch6cVNfnl" alt="" width="375"><figcaption><p>Collectable objects</p></figcaption></figure> <figure><img src="/files/Aq32QlI5ikmyeXUMwmju" alt=""><figcaption><p>Furniture &#x26; Scenery</p></figcaption></figure></div>

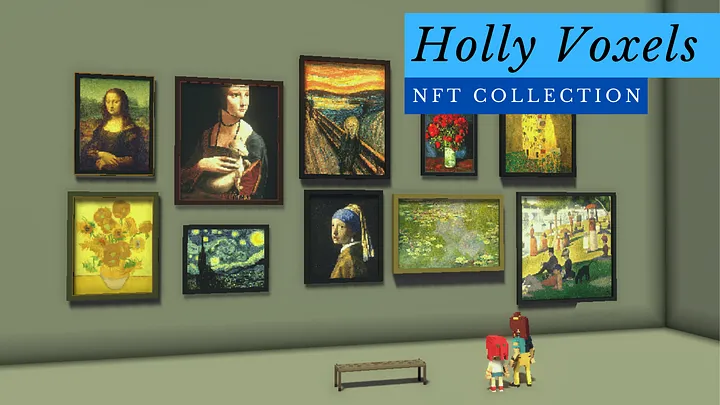
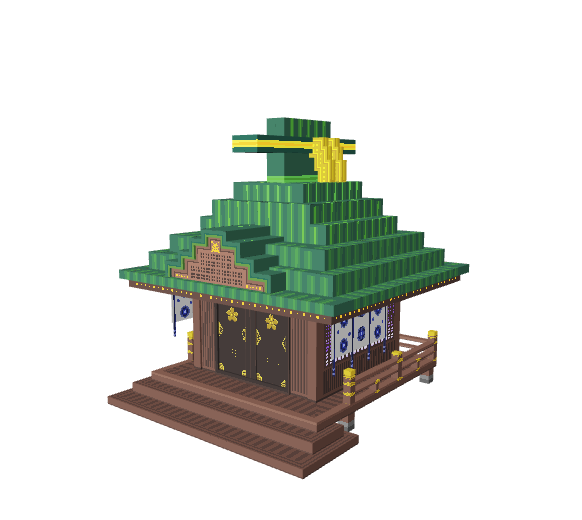
<div><figure><img src="/files/lthNR2YFmNtvgmC7WzdM" alt="" width="563"><figcaption><p>Decorative &#x26; Fine Art</p></figcaption></figure> <figure><img src="/files/42dkBakHJSn1MfwTqHC1" alt="" width="291"><figcaption><p>Simple Buildings</p></figcaption></figure></div>
{% endtab %}

{% tab title="How Do I Use My Creation?" %}

### How Do I Use My Creation?

Once your model is ready, you can [**upload it to your Workspace**](/en/creator/voxedit/upload-assets-to-workspaces.md), add details to describe it, set rarity, and give it attributes to define how it will be uniquely useful in The Sandbox Game. Then it's ready to test in [**Game Maker**](/en/creator/game-maker/create-experiences.md)!

{% hint style="info" %}
Learn more about [**Rarity & Attributes**](/en/creator/basics/assets.md#rarity-and-attributes).
{% endhint %}
{% endtab %}
{% endtabs %}

## Getting Started

{% tabs %}
{% tab title="Open the Modeler" %}

### Open the Modeler

In VoxEdit's **Home** screen, select the **Modeler** in the left menu. Then:

<table data-card-size="large" data-column-title-hidden data-view="cards"><thead><tr><th></th></tr></thead><tbody><tr><td><img src="/files/hAqjqdGayUL8KKDaVpSj" alt="" data-size="line"> Create a new asset</td></tr><tr><td><img src="/files/PPAbZv4fuiXfMQM77zo9" alt="" data-size="line"> Open a previous asset file</td></tr><tr><td><img src="/files/ySG4nCIWq8xUCqvRKSkn" alt="" data-size="line"> Import .VOX (file format)</td></tr><tr><td>Open a recent file (click on a thumbnail)<br></td></tr></tbody></table>

<figure><img src="/files/HkZ0cnHxkCYOSqiffIqc" alt=""><figcaption></figcaption></figure>
{% endtab %}

{% tab title="Modeler Window Tips" %}

### Modeler Window

<table data-view="cards"><thead><tr><th></th><th></th></tr></thead><tbody><tr><td><strong>Tool Tips</strong></td><td><span data-gb-custom-inline data-tag="emoji" data-code="2199">↙️</span> Hover your mouse over anything in VoxEdit for tool tips at the bottom left.</td></tr><tr><td><strong>Performance Data</strong></td><td><span data-gb-custom-inline data-tag="emoji" data-code="2198">↘️</span> See performance data at the bottom right (moved from the Viewport).<br><img src="/files/q7RMUgDeAOIoXhIPF3P2" alt=""></td></tr><tr><td><strong>Dropdown Menu</strong></td><td><span data-gb-custom-inline data-tag="emoji" data-code="2b06">⬆️</span> See <a data-mention href="/pages/cXUcGr3QQ0n99cBJKFJt">/pages/cXUcGr3QQ0n99cBJKFJt</a> for <a data-mention href="/pages/cXUcGr3QQ0n99cBJKFJt#dropdown-menu">/pages/cXUcGr3QQ0n99cBJKFJt#dropdown-menu</a> details.</td></tr></tbody></table>

{% hint style="success" %}
**WORKFLOW TIP**\
**Save Selected Voxels** in the **Edit** menu is a fast workflow option to [Break Down Objects](/en/creator/voxedit/creative-guides/art-techniques/3d-design/break-down-objects.md).
{% endhint %}
{% endtab %}

{% tab title="Viewport: Your Project Space" %}

### Viewport

The **Viewport** is the central area of the screen where you can view and work on your project.

See [Controls & Shortcuts](/en/creator/voxedit/docs/controls-and-shortcuts.md#viewport-controls) to learn how to:

* Take a screenshot
* Position your project
* Adjust camera sensitivity
* Change lighting and background colour

{% hint style="info" %}
The front of an asset is indicated by a white arrow on the floor in the **Viewport** (oriented to the positive <mark style="color:blue;">**Z**</mark> axis). Note the colour coded axes on the [Controls & Shortcuts](/en/creator/voxedit/docs/controls-and-shortcuts.md#gizmo-1).
{% endhint %}

<figure><img src="/files/bPrNh0SBjS0Y6Sgxu0Z7" alt="" width="563"><figcaption><p>Viewport</p></figcaption></figure>

{% hint style="success" %}
Customize the **Viewport** layout into one, two, or four sections and select views. Learn more: [Controls & Shortcuts](/en/creator/voxedit/docs/controls-and-shortcuts.md#viewport-controls)

<img src="/files/mYo2IO61ooYMdLO3UZ0J" alt="" data-size="line"> <img src="/files/cQb5X1ovZC3YKFRCwI7L" alt="" data-size="line"> <img src="/files/RlIrJyBQuo8odlXocoRF" alt="" data-size="line">
{% endhint %}
{% endtab %}
{% endtabs %}

***

## Panels

{% hint style="info" %}
Learn how the **Modeler**'s panels work below. See [Panels & Custom Layouts](/en/creator/voxedit/docs/panels-and-custom-layouts.md) to personalise VoxEdit.
{% endhint %}

### Menubar

{% tabs %}
{% tab title="About" %}
The **Menubar** helps you save, translate, and visualize your project.

<figure><img src="/files/tspDyYC7h8v19H2JJlHW" alt=""><figcaption><p>Default</p></figcaption></figure>
{% endtab %}

{% tab title="Controls" %}

#### **Controls**

<table data-view="cards"><thead><tr><th></th><th></th><th></th><th data-hidden data-card-cover data-type="files"></th></tr></thead><tbody><tr><td><strong>Save</strong></td><td><img src="/files/4k4LMMpHdqkF4H7lgIJM" alt="" data-size="original"><kbd>CTRL</kbd>+<kbd>S</kbd></td><td>Commit to changes.<br><br><span data-gb-custom-inline data-tag="emoji" data-code="2139">ℹ️</span> Use <strong>File</strong> -> <strong>Save As</strong> to save another version of your project.</td><td></td></tr><tr><td><strong>Volume Resolution</strong></td><td><img src="/files/ilB9uZtSuZa9O6AoCSkC" alt=""> Increase<br></td><td>Double the size of your asset.<br><span data-gb-custom-inline data-tag="emoji" data-code="2139">ℹ️</span> The amount of detail will not increase.</td><td></td></tr><tr><td><strong>Volume Resolution</strong></td><td><img src="/files/oWGdcNAs089oTi0aO4D5" alt=""> Decrease</td><td>Halve the size of your asset.<br> <span data-gb-custom-inline data-tag="emoji" data-code="26a0">⚠️</span> This reduces the level of detail. Undo to restore your design if needed.</td><td></td></tr><tr><td><strong>Rotate</strong></td><td><img src="/files/cGL9JvphIj3iaMcwfus3" alt=""> <img src="/files/hPRUmYfVUuvIw434JaN2" alt=""> <img src="/files/AKhtHfTE1ibxRWKPEgvJ" alt=""></td><td>Turn the entire Block 90 degrees around the <mark style="color:red;"><strong>X</strong></mark>, <mark style="color:green;"><strong>Y</strong></mark>, or <mark style="color:blue;"><strong>Z</strong></mark> axis.</td><td></td></tr><tr><td><strong>Flip</strong></td><td><img src="/files/EhVsLOgM1vtvQma7dyEk" alt=""> <img src="/files/XNKdYpWY90D1xdclr4zq" alt=""> <img src="/files/I0oieTDy59hBbQiPpjxJ" alt=""></td><td>Flip the entire Block 180 degrees.</td><td></td></tr><tr><td><strong>Mirror</strong></td><td><img src="/files/3e5vaBVLDMhyGKy6HsNn" alt=""> <img src="/files/T3O6EmF9V3jPAH7UPj3Q" alt=""> <img src="/files/nHmYJK3pnA0ya1fekNMV" alt=""></td><td>Toggle on and off a line of symmetry on the <mark style="color:red;"><strong>X</strong></mark>, <mark style="color:green;"><strong>Y</strong></mark>, or <mark style="color:blue;"><strong>Z</strong></mark> axis for mirrored editing.</td><td></td></tr><tr><td><strong>Trim Volume</strong></td><td><img src="/files/c9m4NVZMvh9hFudZqwxb" alt=""> </td><td>Shrink the bounding box to the smallest collision boundary for the voxels.</td><td></td></tr><tr><td><strong>Volume Dimensions</strong></td><td><img src="/files/3dkZZVyTVdt8u82uHlcp" alt="" data-size="line"> <img src="/files/zUFxfd8eqbccwJPdNWV0" alt="" data-size="line"> <img src="/files/1WsFYW0EEyTLoD8hu5Hx" alt="" data-size="line"></td><td>Set the number of voxels in <mark style="color:red;"><strong>X</strong></mark><strong>, </strong><mark style="color:green;"><strong>Y</strong></mark><strong>, and </strong><mark style="color:blue;"><strong>Z</strong></mark> dimensions by typing a value or clicking elsewhere.</td><td></td></tr><tr><td><strong>Voxel Edges</strong></td><td><img src="/files/h3RSoa1UMXiqvaC3O1Ra" alt=""> <br></td><td>Reveal a grid guide showing the edges of all voxels in the model, for precision work such as creating a pattern and measurement.</td><td></td></tr><tr><td><strong>Quad Edges</strong></td><td><img src="/files/eZd86pHLNEpwb21keJeP" alt=""> </td><td>Outline quad divisions of voxels in the model.</td><td></td></tr><tr><td><strong>Nice Edges</strong></td><td><img src="/files/O04fKjb31hDI2WEbH6pU" alt=""> </td><td>Outline all 90 degree edges of voxels in the model.</td><td></td></tr><tr><td><strong>Hide Edges</strong></td><td><img src="/files/IKKCkVFmzFGKbTkx83OF" alt=""> </td><td>Show a clear view of the Block without a grid guide, which is how it will appear in The Sandbox.</td><td></td></tr><tr><td><strong>Focus</strong></td><td><img src="/files/tPVUdWTMZb0zYMHkjVUK" alt="" data-size="original"> <kbd>F</kbd></td><td>Focus the camera to the default start position.</td><td></td></tr></tbody></table>

{% hint style="warning" %}
**SCALE**\
New projects in the Modeler begin with a volume of 32x32x32 voxels (equal to the size of a block). Modify these dimensions to create your asset in the correct scale. Learn more: [Asset Scale](/en/creator/voxedit/docs/ve-guidelines/asset-scale.md)
{% endhint %}

{% hint style="success" %}
**LIMIT**\
The maximum size for a model's bounding box is 256x256x256 voxels.
{% endhint %}
{% endtab %}
{% endtabs %}

### Toolbar

{% tabs %}
{% tab title="About" %}
The **Toolbar** allows you to choose how to paint on your block, with different shapes and depths.

{% hint style="info" %}
The **Modeler** combines modes with tools to add, erase, paint, and select voxels. Learn more: [Use Modes & Tools Together](/en/creator/voxedit/docs/modeler/use-modes-and-tools-together.md)
{% endhint %}

<figure><img src="/files/1EnUMWyBA7apnlFN1OSH" alt=""><figcaption><p>Resized</p></figcaption></figure>
{% endtab %}

{% tab title="Controls" %}

#### Controls

**Modes**

<table data-card-size="large" data-view="cards"><thead><tr><th></th><th></th></tr></thead><tbody><tr><td><img src="/files/RUk69CVIfXm0HXCytGqE" alt=""> <strong>Select</strong></td><td>Select voxels to cut, copy, move, or save as a new model.</td></tr><tr><td><img src="/files/0lmyyNrB56qFxpfnEZ2y" alt=""> <strong>Erase</strong></td><td>Remove voxels within the model's volume.</td></tr><tr><td><img src="/files/7imjunuVgPmnPDihTgnX" alt=""> <strong>Create</strong></td><td>Add voxels within the model's volume.</td></tr><tr><td><img src="/files/qXAdj5gnGToy0mZB58oR" alt=""> <strong>Paint</strong></td><td>Paint voxels with the selected colour swatch, found in the Palette.</td></tr></tbody></table>

**Tools**

<table data-view="cards"><thead><tr><th></th><th></th></tr></thead><tbody><tr><td><img src="/files/k6aldFanE6sGdUFfXiV4" alt=""> <strong>Pencil</strong></td><td>Click or drag to affect single voxels (free editing).</td></tr><tr><td><img src="/files/uNQF9iBkX3moQdY4b5S7" alt=""> <strong>Line</strong></td><td>Click and drag to affect a straight line of voxels.</td></tr><tr><td><img src="/files/D2J8ZwxEshWDcdf7C0ZQ" alt=""> <strong>Rectangle</strong></td><td>Click and drag to affect voxels in a rectangle from the screen's perspective.</td></tr><tr><td><img src="/files/jjj7DpAXq7glBkBy3ngY" alt=""> <strong>Circle</strong></td><td>Click and drag to affect voxels in an ellipse from the screen's perspective.</td></tr><tr><td><img src="/files/ihLmGGi1IJUJS34PhVYj" alt=""><strong>Sphere</strong> </td><td>Click and drag to affect voxels in a sphere shape.</td></tr><tr><td><img src="/files/BcjUIRyk2V8MJaq4Avo4" alt=""> <strong>Box</strong></td><td>Click and drag to affect voxels within a box shape.</td></tr><tr><td><img src="/files/AvWSxyF1rKcIHEUlSaCk" alt=""> <strong>Face</strong></td><td>Click to affect voxels on a contiguous face (not including voxels touching only on their corners).</td></tr><tr><td><img src="/files/W0uKGDjt5OGi5vQPh7UD" alt=""> <strong>Bucket</strong></td><td><p>Click to affect all voxels of the same colour that touch.</p><p><br></p></td></tr><tr><td><img src="/files/uvFUT516hwxcm3SEdDVR" alt=""> <strong>Picker</strong></td><td>Select a colour on the surface of your project (updates the <strong>Materials</strong> and <strong>Palette</strong> panels).</td></tr></tbody></table>

**Misc**

<table data-card-size="large" data-view="cards"><thead><tr><th></th><th></th></tr></thead><tbody><tr><td><img src="/files/uvFUT516hwxcm3SEdDVR" alt=""> <strong>Picker</strong></td><td><img src="/files/KhXcjkNEXawGf00lEGF0" alt=""><br>Select the surface colour of a model (updates <strong>Materials</strong> and <strong>Palette</strong> panels).</td></tr><tr><td><img src="/files/zJBWkAIzJvdtsWUK3Q7q" alt=""> <strong>Pivot</strong></td><td>Set the model's origin point. This determines how it is positioned and rotated in Game Maker and the VoxEdit <a data-mention href="/pages/j2gFHrVCJrJz8XvizJUk">/pages/j2gFHrVCJrJz8XvizJUk</a>.<br><br>Learn more:<br><a data-mention href="/pages/zF0KTCn0PVjdlEGM7b8A">/pages/zF0KTCn0PVjdlEGM7b8A</a></td></tr><tr><td><img src="/files/pMMJVr7apJkZsA4pYnAx" alt=""> <strong>Volume Resizer</strong></td><td>Expand or reduce the volume (editing space) of a model in any direction.</td></tr><tr><td><img src="/files/WdWdCr506u3ZPaP7t51e" alt=""> <strong>Frame</strong></td><td> Select a rectangular area of a model for image, NFT, and video display. <br><br>Learn more: <a data-mention href="/pages/RYdwfe1PuPVo19gE0CKa">/pages/RYdwfe1PuPVo19gE0CKa</a> </td></tr></tbody></table>
{% endtab %}
{% endtabs %}

### Palette

{% tabs %}
{% tab title="About" %}
The **Palette** holds colours for your project in up to 255 swatches, or locations. This data is stored in small .PNG files. Palettes are easy to customise.

<div><figure><img src="/files/4ZbepX7RJtCcHZxV1FFe" alt="" width="236"><figcaption><p>A <kbd>white square</kbd> highlights <br>the selected swatch.<br>Resized</p></figcaption></figure> <figure><img src="/files/5pGKARSyzBa6uXyCRNLY" alt="" width="375"><figcaption><p>Recommended uses for the default palette</p></figcaption></figure></div>
{% endtab %}

{% tab title="Controls" %}

#### Controls

<table data-view="cards"><thead><tr><th></th><th></th></tr></thead><tbody><tr><td><strong>Select a Swatch</strong></td><td>Left click on a swatch</td></tr><tr><td><strong>Change Swatch Size</strong></td><td><img src="/files/rvhqgixidrhzFbcbJeJf" alt="" data-size="line"> Toggle between small, medium, and large</td></tr><tr><td><strong>Save, Load, or New Palette</strong></td><td><img src="/files/gjOOQB00oU3vFyWf9a4u" alt="" data-size="line"> Open the menu</td></tr></tbody></table>

VoxEdit applies colour based on data in a swatch location.&#x20;

{% hint style="warning" %}
If you used a swatch to paint a block, any changes to that swatch's colour will apply to the block:

* Changing a swatch's colour in the Materials panel
* Loading a palette with a different color in the same swatch location
  {% endhint %}

Create a new colour with the **Materials** panel or customise the **Palette** using existing colours.

#### Swatch Position & Blending

<figure><img src="/files/DLXgf9zCfYsjWANRf8qN" alt="" width="525"><figcaption><p>2024 Palette Updates</p></figcaption></figure>

<table data-view="cards"><thead><tr><th></th><th></th></tr></thead><tbody><tr><td><strong>Cut, Copy &#x26; Paste</strong></td><td>Select or right click to cut, copy &#x26; paste swatch colours into other swatch locations.</td></tr><tr><td><strong>Move (Drag &#x26; Drop)</strong></td><td>Click and hold, drag, and drop to another location</td></tr><tr><td><strong>Blend</strong></td><td>Space colours apart as desired, select and drag from one colour to the other, right click, select <strong>Blend</strong> in the menu.</td></tr></tbody></table>
{% endtab %}
{% endtabs %}

### Materials

{% tabs %}
{% tab title="About" %}
The **Materials** panel is used to change the colour of the swatch that is selected in the **Palette**.

<figure><img src="/files/meaCFPSDpKr6UgcCpi8B" alt="" width="235"><figcaption><p>A <kbd>white rectangle</kbd> highlights <br>the selected swatch colour<br>Default</p></figcaption></figure>
{% endtab %}

{% tab title="Controls" %}
{% hint style="warning" %}
Changing a swatch's colour will change the colour on your creation anywhere it has been used.
{% endhint %}

#### Manual Colour Change

<table data-view="cards"><thead><tr><th></th></tr></thead><tbody><tr><td><strong>Slide</strong> <img src="/files/QomX9zQc2QyRkrMdMAnD" alt="" data-size="line"><br><br><img src="/files/ZYksLSdkQFjZIFmZvNgi" alt="" data-size="original">   <span data-gb-custom-inline data-tag="emoji" data-code="2195">↕️</span> <mark style="color:yellow;"><strong>Hue</strong></mark></td></tr><tr><td><strong>Drag</strong> <img src="/files/Rzaa0YEeR5Vhu7wXgIsd" alt="" data-size="line"> <br><br><img src="/files/vjFCvQBlDT5AM6O8BVs6" alt="">   <span data-gb-custom-inline data-tag="emoji" data-code="2195">↕️</span> <mark style="color:yellow;"><strong>Tint</strong></mark><br> <br><span data-gb-custom-inline data-tag="emoji" data-code="2194">↔️</span> <mark style="color:yellow;"><strong>Saturation</strong></mark><br></td></tr><tr><td><strong>Toggle button</strong><br><br><img src="/files/Vrcr19pBupG4cCPdprzj" alt="" data-size="original"> <mark style="color:yellow;"><strong>Emissive Colour</strong></mark><br><br><span data-gb-custom-inline data-tag="emoji" data-code="2139">ℹ️</span> This icon appears in the preview box and on the colour swatch if emissive is applied.</td></tr></tbody></table>

{% hint style="info" %}
Emissive colours have a soft glow, but don't affect nearby assets in a game (builders use [Light](/en/creator/game-maker/docs/components/display/light.md)).
{% endhint %}

{% hint style="success" %}
Emissive colours are often used for lighted buttons on panels, fire, and other luminous details.
{% endhint %}

#### Colour Match

* **Set Colour (code):** Type RGB, HSB, or HEX codes and press <kbd>**ENTER**</kbd>.
* **Colour Sample (screen):** Click <img src="/files/ege5WDtVwckwde7uRqnZ" alt="" data-size="line"> and hold, hover over a color, and release.

{% hint style="warning" %}
Colours may differ slightly between VoxEdit, the Marketplace, Game Maker, and the Game Client.
{% endhint %}
{% endtab %}
{% endtabs %}

### Layers

{% tabs %}
{% tab title="About" %}
The **Layers** panel is used to manage layers in your model, which flatten when you [upload](/en/creator/voxedit/upload-assets-to-workspaces.md) it as an asset.

{% hint style="success" %}
Building separate layers that you can hide and reveal can be useful for designing clothing, applying damage or wear, separating component parts, etc.
{% endhint %}

<figure><img src="/files/R4PhHk6jZ9mdVHUej5LC" alt="" width="224"><figcaption><p>Default</p></figcaption></figure>
{% endtab %}

{% tab title="Controls" %}

#### Controls

<table data-column-title-hidden data-view="cards"><thead><tr><th></th></tr></thead><tbody><tr><td><img src="/files/BDFRSTA65l940ZGG8PjO" alt=""> <strong>New Layer</strong></td></tr><tr><td><img src="/files/EU641ClE4mkpaSFE2F8p" alt=""> <strong>Clone Layer</strong></td></tr><tr><td><img src="/files/P9oJXkUjxo6qtqKzFFBn" alt=""> <strong>Edit Name</strong></td></tr><tr><td><img src="/files/qBJR0iMQlBkVWkWOD8DV" alt=""> <strong>Merge Layers</strong><br>(select layers first)</td></tr><tr><td><img src="/files/lkIhH0IfxUT2ZLp3nnX2" alt=""> <strong>Delete Layer</strong></td></tr><tr><td><img src="/files/WAIx6dvxfpqfr4OXbGlX" alt=""> <img src="/files/Qju6cDkceycAW8zxNhBT" alt=""> <strong>Toggle Layer Visibility</strong></td></tr></tbody></table>
{% endtab %}
{% endtabs %}


---

# Agent Instructions: Querying This Documentation

If you need additional information that is not directly available in this page, you can query the documentation dynamically by asking a question.

Perform an HTTP GET request on the current page URL with the `ask` query parameter:

```
GET https://docs.sandbox.game/en/creator/voxedit/docs/modeler.md?ask=<question>
```

The question should be specific, self-contained, and written in natural language.
The response will contain a direct answer to the question and relevant excerpts and sources from the documentation.

Use this mechanism when the answer is not explicitly present in the current page, you need clarification or additional context, or you want to retrieve related documentation sections.