🟢Post Process Effects
Introduced in Game Maker 0.8.
COPY/PASTE PARAMETERS
New in GM 0.11! Right click on a behaviour or component to copy. Then open an object, add the same behaviour or component, and right click it to paste identical parameter settings.
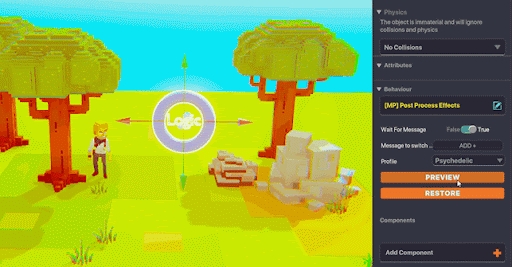
Change the appearance of an Experience via the camera. Use profiles or custom settings.
 Post Process Effects [MP]
Parameters

Wait For Message - Determines whether the behaviour should activate immediately upon starting the game (False), or if it activates once it receives a message (True). Add or remove messages to activate the behaviour in the "Messages to switch".
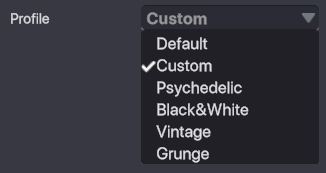
Profile - Take a pick from a range of preset Post Process Effects, or make your own Custom effect. Choosing 'Custom' will give you a range of parameters to edit.
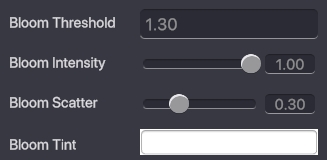
Bloom Threshold - Bloom Intensity - Determines how strong the bloom (glow) effect is. Bloom Scatter - Determines the range of the bloom effect. Higher values makes the bloom effect radiate at a larger distance. Bloom Tint - Select the colour of your bloom effect.
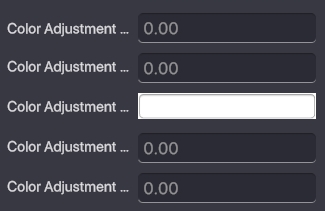
Color Adjustment - Color Adjustment - Color Adjustment - Color Adjustment - Color Adjustment -
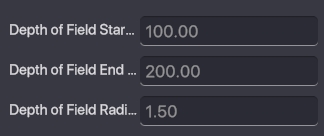
Depth of Field Start - Determines how far from the player the 'depth of field' effect will be visible. Higher values set the depth of field to start further away. Depth of Field End -
![]()
![]()
![]()

What Is It?
The Post Processing Effects Behaviour will apply a visual modifier to the viewport of the player.
The Behaviour comes with a range of predefined effects, including Psychadelice, Black & White, Vintage, and Grunge - however, the parameters can also be adjusted using Custom to create a unique look.
Post-processing effects are calculations applied to the camera and alter the visuals, not the actual Blocks or Objects in the scene.
The visuals can be adjusted using tools such as bloom, ambient occlusion, colour correction, and depth of field blurring.
Applying the Behaviour
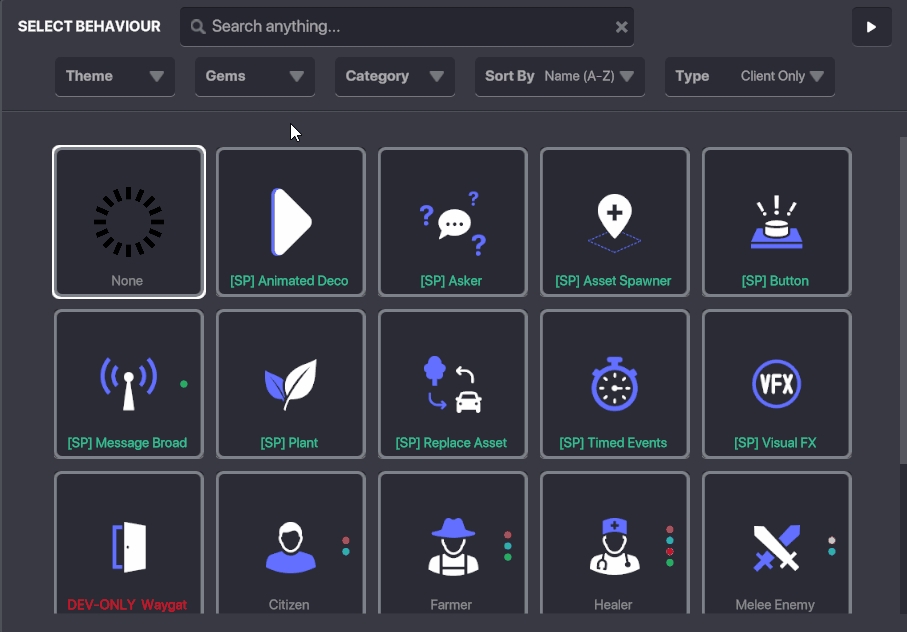
Because this is a Synchronized Behaviour, it won't be visible in the default view when the Behaviour pop-up window opens.
To select the Behaviour, click the ‘Type’ filter in the top right corner and select ‘Synchronized’ when adding it to an Object.
Parameters
Wait for Message
Setting Wait for Message to ‘FALSE’ means the Post Processing Effect will be active as soon as the Experience loads.
Setting Wait for Message to ‘TRUE’ means the Post Processing Effect will only activate when the Behaviour receives a specific message.
When Toggled to ‘TRUE’, the Message to Switch field will become visible, and you can use it to select an existing message or create a new one that will be used as the Behaviour trigger.
Profile
The Post Process Effects Behaviour comes with various preset effects that can be selected from the drop-down, such as Psychedelic, Black & White, Vintage, and Grunge.
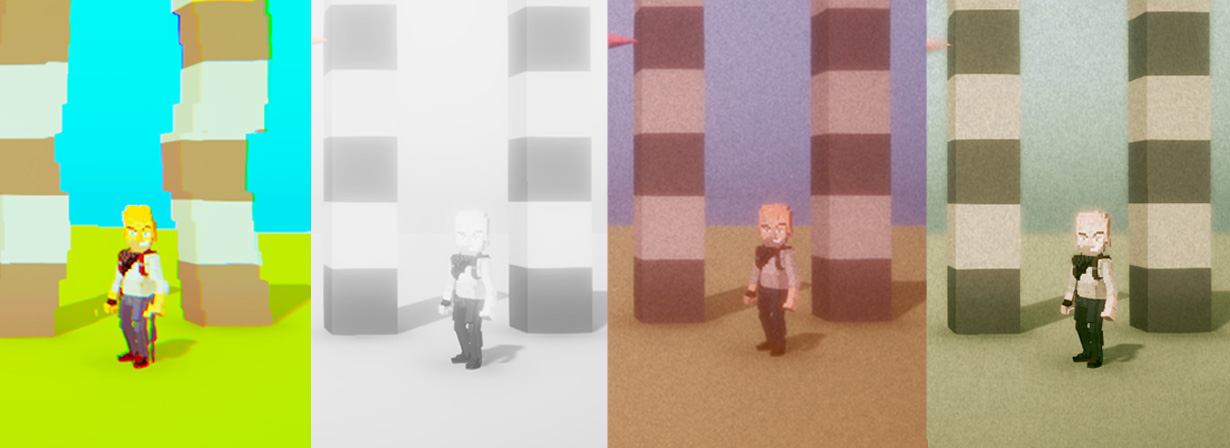
There is also an option for Default, which will set the scene back to the default ambience setting of the Experience.
Choosing Custom will reveal a range of Parameters that can be adjusted to create new and unique looks to suit your needs.
Custom Effects
When Custom is chosen from the Profile drop-down list, a new set of variables will become available.
Custom Effects allow creators to develop a unique look by adjusting Bloom, Colour, Depth of Field, Grain, Chromatic Aberration, Motion Blur, Lens Distortion, and Vignette.
Bloom
This parameter causes high-vibrance colours to blur slightly into surrounding pixels, giving the impression of glowing.
Bloom Threshold [Value]
Bloom threshold refers to the brightness level at which the pixels begin to glow.
Pixels with a brightness greater than the threshold value will be affected by the bloom effect, while pixels with a brightness less than the threshold value will not be affected.
If the Bloom Threshold is set low, for example, to 0.10, then even low vibrance pixels in the scene will be affected. As the value increases, fewer pixels will react according to their level of vibrance.

In the image on the left, the Bloom Threshold is set to 0.8, so high-vibrance pixels, like red, are affected the most. The image on the right has a Bloom Threshold set to 0.0, so low-vibrance pixels (even black) are affected by Bloom.
Bloom Intensity
This variable controls the strength of the bloom effect.
It can be set to a range of values from 0 to 1, with 0 being no bloom effect and 1 being the maximum bloom effect.
In the following example, both images have a Bloom Threshold of 0.5.
The image on the left has a Bloom Intensity of 0.1, and the effect is hard to see even though there are pixels above the threshold.
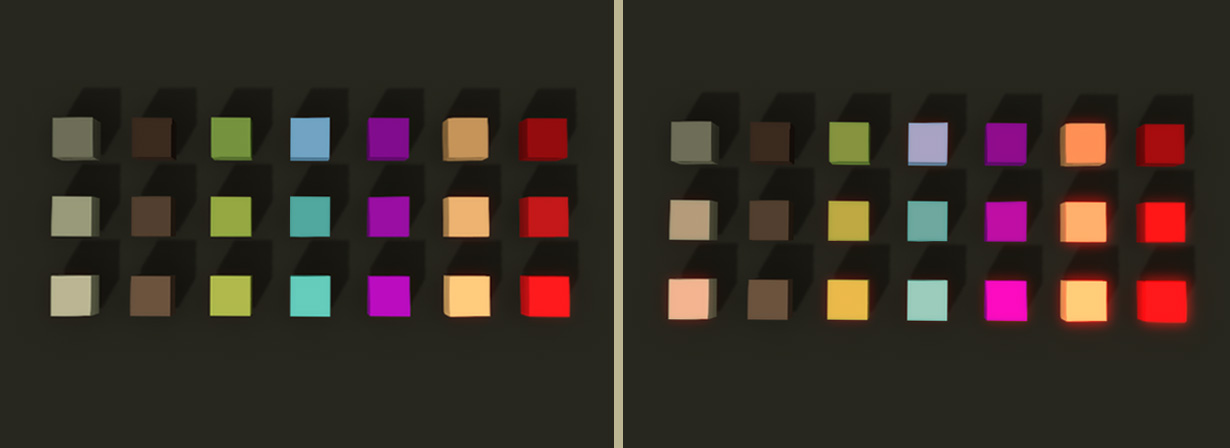
The image on the right has intensity set to 1.0, and the Bloom Effect can be seen working on the most vibrant pixels.
Bloom Scatter
This parameter controls the spread of the Bloom effect and can be set to a value between 0 and 1, with 0 being no spread and 1 being the maximum spread.
A higher value will result in a broader, more diffused Bloom effect, while a lower value will result in a more concentrated and focused bloom effect.
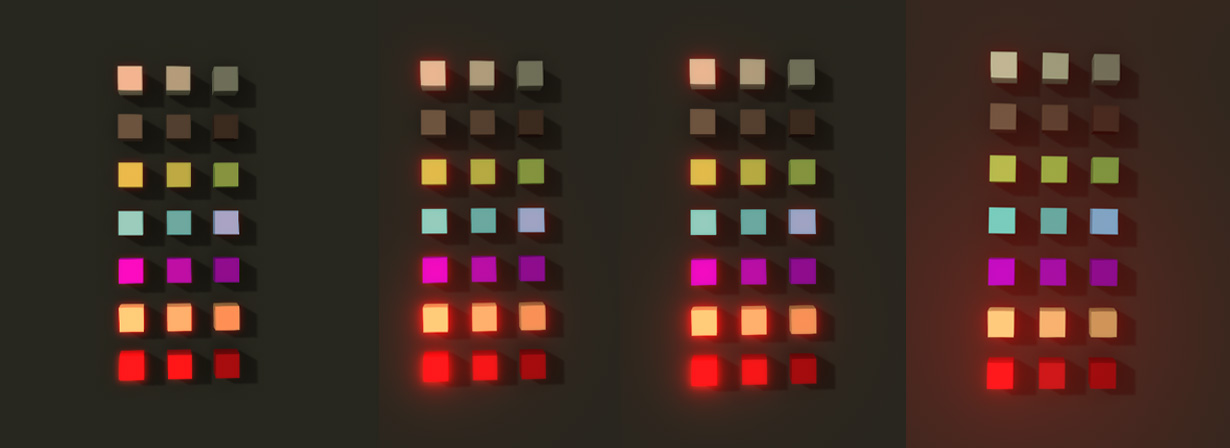
In the image below Threshold has been set to 0.5 and the Intensity to 1.00.
From left to right, the Bloom Scatter has been set to 0.00, 0.3, 0.6, and 1.00, resulting in a range from no Bloom Scatter to a full Bloom Scatter.
Bloom Tint
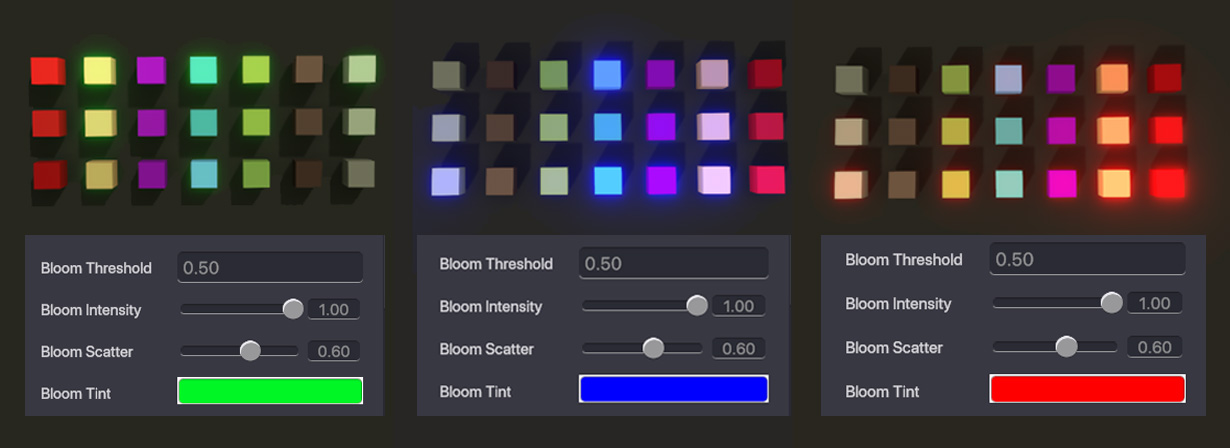
This parameter allows you to adjust the colour of the Bloom effect.
The colour can be selected by clicking on the colour bar in the Properties Panel and then using the colour picker.
Colour Adjustment
Colour Adjustment impacts the overall colour of the scene and influences anything in the viewport, including the colour of Blocks, Objects, and the Skybox.
Creators can customise the effect to achieve a specific mood or atmosphere in an experience by editing Exposure, Contrast, Colour, Hue, and Saturation.
Colour Adjustment Exposure
This variable controls the overall brightness of the image. Increasing the exposure will make the image brighter while decreasing the exposure will make the image darker.
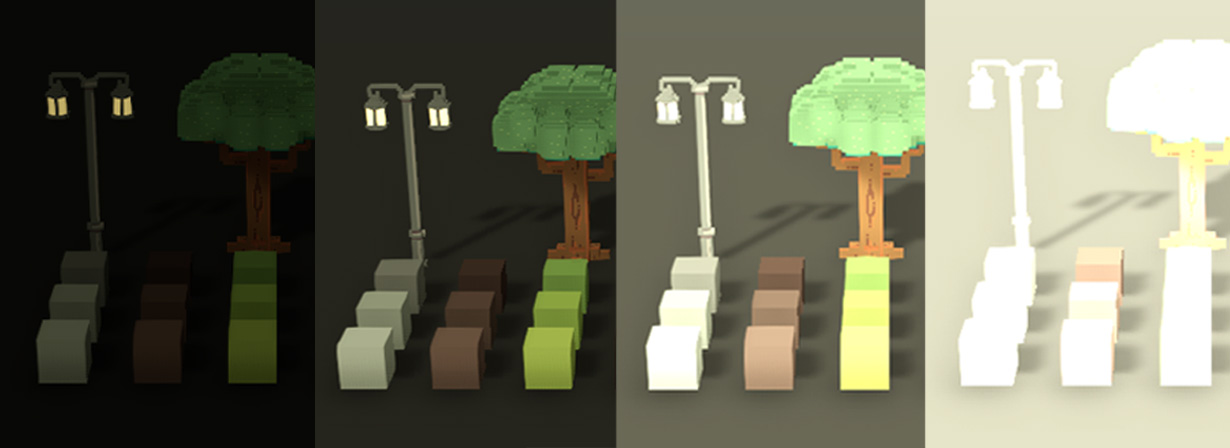
While the value field has no numerical limit, the range at which exposure impacts the scene is between -5 and 5. Setting the value to 0 will result in no adjustment, while negative values will decrease the exposure, and positive values will increase the exposure.
Colour Adjustment Filter
This variable allows you to add a colour filter to the entire scene by using the colour picker tool in the Properties Panel.
Choosing a colour other than white will influence the colours of Blocks and Objects depending on how light or dark they already are. Lighter colours in the scene will take on more of the filter colour than dark colours in the scene.
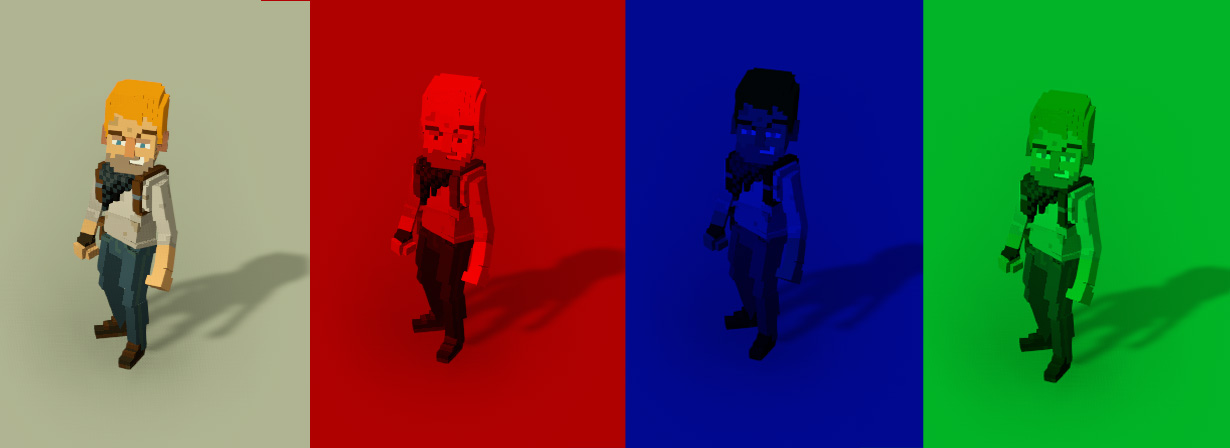
Colour Adjustment Hue Shift
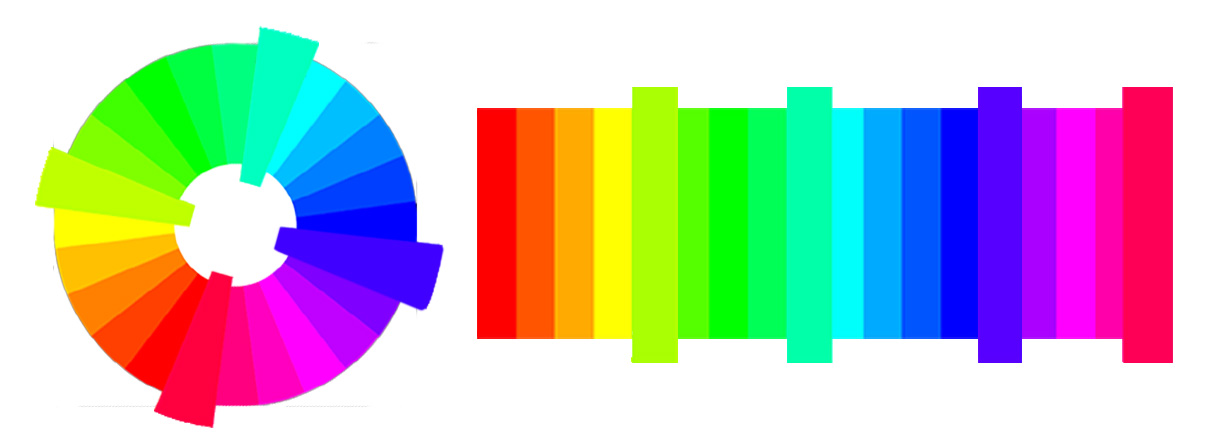
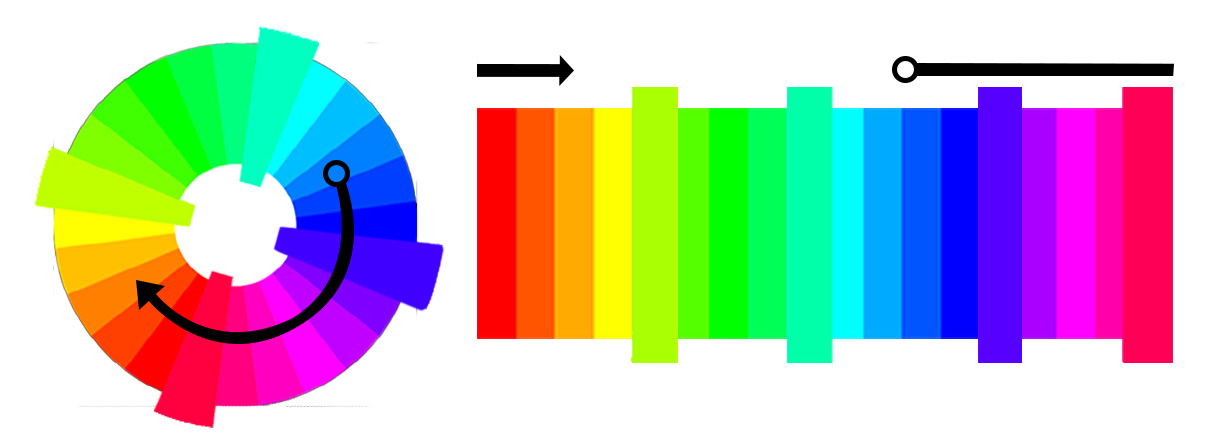
This variable changes the colours in a scene by ‘shifting’ existing Hues to their neighbouring Hue around the colour wheel.
Adjusting this variable starts at a value of 0.00, representing the original Hue and means there's been no 'shift' in either direction around the colour wheel.
Because a full rotation around a circle is 360 degrees, the Hue can be 'shifted' from 0.00 by setting a positive OR negative value between -180 and 180. This will move the Hue in one direction or the other around the colour wheel.
In the image to the right of the centre Block, the Hue Shift value is set to 0. 90, which moves the Hue a quarter of the way around the colour wheel, resulting in a PINK Hue.
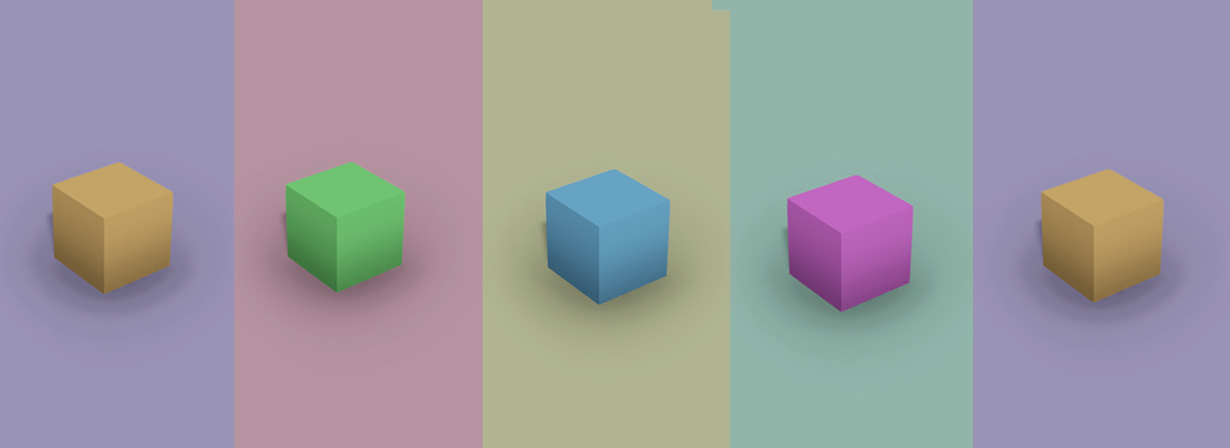
In the image to the right of the centre Block, the Hue Shift value is set to 0. 90, which moves the Hue a quarter of the way around the colour wheel, resulting in a PINK Hue.
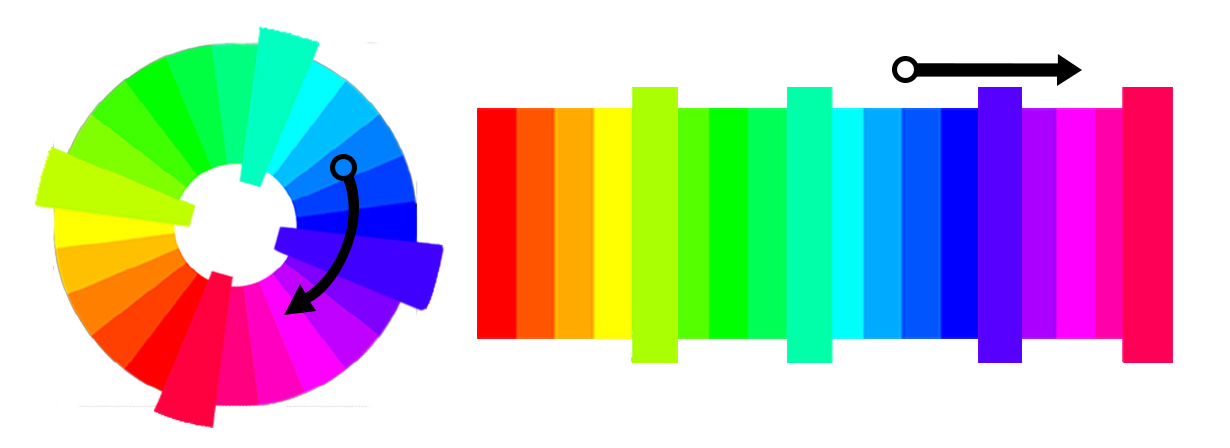
The image to the far right has Hue Shift set to a value of 180, moving the Hue halfway around the colour wheel to ORANGE and corresponding with the opposite side of the original Hue.
Colour Adjustment Saturation
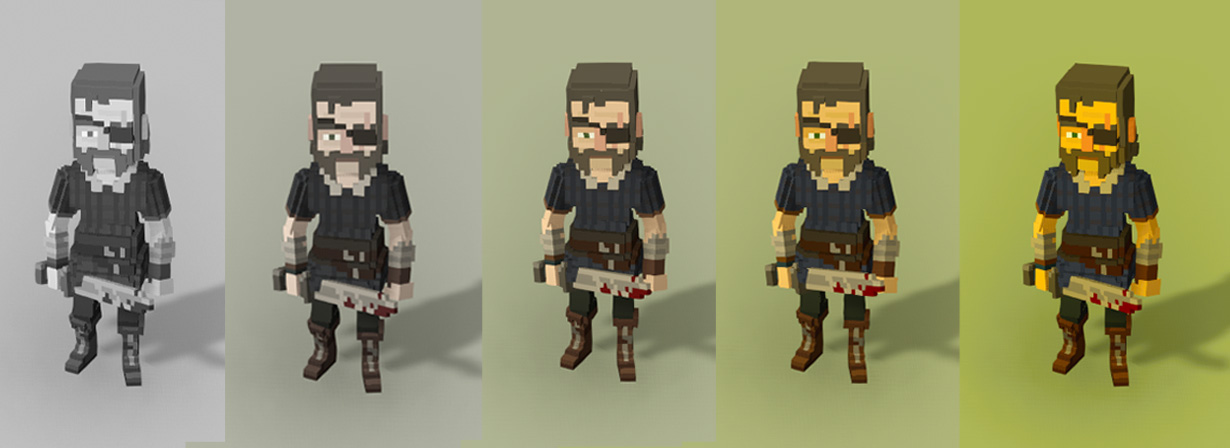
This variable controls the intensity of the colours in the scene.
Increasing the saturation will make the colours more vibrant while decreasing the saturation will mute colours.
This variable can be customised to any value, but the active effect range sits between -100 (decreasing the saturation) and 100 (increasing the saturation), with a value of 0 resulting in no adjustment.
Depth of Field
Depth of Field (DOF) defines the distance from the camera at which the environment, and objects within the environment, are either in or out of focus.
This parameter simulates DOF but doesn’t work like a lens on a camera. Instead, it establishes a distance at which the blur starts and a distance where it ends.
This range is defined by Start Distance, End Distance, and Field Radius and the values are measured in meters (1 Block = 1 meter).
From the Camera to the Start Distance, there is no blur, from Start Distance to End Distance, there will be a linear increase in the blur, and from End Distance onward, the blur will be at its maximum.
Because the Depth of Field is set from the location of the CAMERA, not the AVATAR, keep in mind the Global Camera Settings when using this effect, as the parameters for the camera, such as 1st Person, 3rd Person, Angled, and Top Down, will drastically affect the end result.
Depth of Field Start Distance
This variable controls the distance from the camera at which the effect begins. Only Objects closer than the set distance will be in focus.
Depth of Field End Distance
This variable controls the distance from the camera at which the effect ends. Objects farther away from the camera than this distance will gradually become blurrier.
Depth of Field Radius
The radius impacts how many pixels will offset the read to generate the blur, and while any number can be entered, the active range is between 0 and 2, where 0 results in no DOF at all.
Field Radius needs to be set to greater than 0 for the DOF effect to be active.
Grain
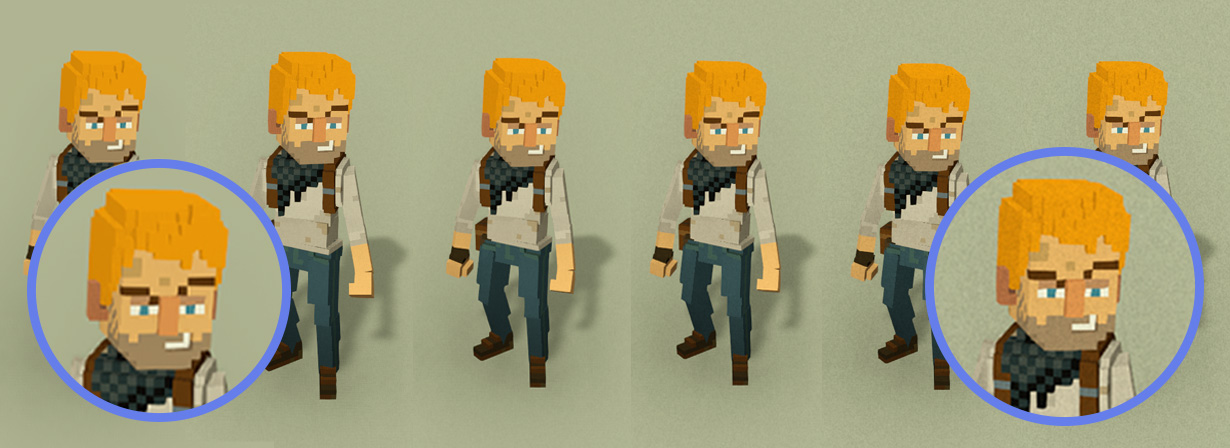
This effect adds a film grain appearance to the viewport, making everything in the scene look ‘muddier’ or more pixelated.
Grain Intensity
Grain Intensity can be set using the slider or by directly entering a value between 0 and 1, where 0 is no grain and 1 is the maximum grain.
Chromatic Aberration
This causes the primary colours in the scene (Red, Green, and Blue) to displace slightly from each other and has a greater effect on the field of view near the edge of the viewport.
Chromatic Aberration Intensity
Chromatic Aberration can be set using the slider or by directly entering a value between 0 and 1. In the image below, the left side has a value of 0, resulting in no Chromatic Aberration, and the right side has a value of 1, which results in maximum Chromatic Aberration.

Motion Blur
This effect adds a blur to the camera when it moves, which simulates the human eye, and can add a greater sense of speed and dynamic motion.
The effect is most noticeable during quick or vigorous movement that causes the camera to move suddenly from one location to another, such as when the Avatar is sprinting or jumping or when the camera is rotated around the Avatar from one perspective to another.
Motion Blur Intensity
Motion Blur Intensity can be set using the slider or by directly entering a value between 0 and 1, where 0 is no Blur, and 1 is the maximum Blur.
The below image shows values from left to right at 0.0, 0.2, 0.4, 0.6, 0.8, and 1.00, resulting in no blur through to an intense blur.

Lens Distortion
This effect simulates distortion caused by the shape of a camera lens.

In the above example, a fish-eye effect is created by warping the edges of the screen and scaling the image further away from the default view.
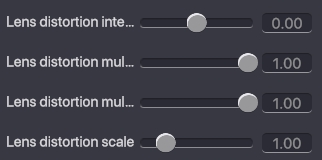
This is done by setting the Intensity to 1.0, the X Multiplier to 1.00, the Y Multiplier to 0.70, and the Scale to 0.5.
The X Multiplier or Y Multiplier must be set to at least 0.01 for Intensity or Scale to work.
Lens Distortion Intensity
This variable controls the overall amount of distortion applied to the scene and acts as an amplifier based on the parameters set in X Multiplier, Y Multiplier, or Scale.
The value of this variable can be selected using the slider, or it can be entered in the field using a range between 0 and 1, where 0 is no distortion, and 1 is maximum distortion.
Lens Distortion X Multiplier
This parameter controls the amount of distortion applied along the X-axis of the scene (running from the left to the right of the viewport), can be adjusted using the slider or entered directly into the field, and can be set between 0 and 1.

A positive value will result in a stretching and bulging effect, as though the image in the viewport is being pulled out to the sides of the screen while the centre appears to be pushed outwards towards the viewer.
Because of the curve and stretch created by the effect, objects closer to the edge of the screen will appear smaller, while objects closer to the centre of the screen will appear magnified.
Lens Distortion Y Multiplier
This parameter controls the amount of distortion applied along the Y-axis of the scene (running from the top to the bottom of the viewport).
This value can be adjusted using the slider or entered directly into the field and can be set between 0 and 1.

A positive value will result in a stretching and bulging effect similar to the X Multiplier, the image will still curve outwards in the centre, but the image will be pulled towards the top and bottom of the screen.
Lens Distortion Scale
This parameter controls global screen scaling, which zooms the camera closer towards or further away from the default view.
This value can be set in a range between 0.01 and 5, where 1 is the default view and applies no scaling, 5 is maximum scaling, and 0.01 is the minimum scaling.

Vignette
Vignetting refers to the gradual reduction of an image's brightness or saturation around the edges of the screen.
This effect is often used to draw the viewer's attention to the centre of the frame, and while this can lend a classic film feel, it also comes at the cost of reducing the field of view.
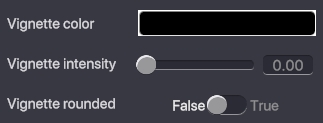
Vignette Colour
This variable is used to define the colour of the Vignette.
To choose a colour, click on the colour bar in the Properties Panel and make a selection using the colour picker, sliders, or hex code.

The Vignette acts as a mask, where white represents total transparency, and black represents no transparency. To adjust the colour for varying degrees of transparency, you can use the saturation and Vibrance sliders.
Setting the Saturation of the colour will determine how transparent the effect will be as it moves closer to or further away from white. A high Saturation will be more transparent, and a low Saturation will be less transparent. Setting the colour to white will make the Vignette totally transparent.
Setting the vibrance of the colour will also determine how transparent the effect will be as it moves closer to or further away from black. A high Vibrance will have more of the chosen colour and more transparency, while a low Vibrance will get gradually darker and less transparent. Setting the colour to black will make the Vignette totally solid.

Vignette Intensity
Vignette Intensity controls the transparency and fall-off of transparency from the centre of the screen to the other edges of the screen.
This variable can be set between 0-1, where 0 results in no Vignette, and 1 creates a thick semi-transparent border around the screen, leaving only a small oval or circle in the centre of the screen.

Using values between 0-0.5 will add a dark border to the screen that will become more transparent closer to the centre of the screen.
From 0.5 - 1, the outer edges of the effect will be a consistent level of transparency, and there will be less fade towards the centre of the screen.
Vignette Rounded
This toggle controls the shape of the Vignette between an oval or a circle.

Setting this parameter to ‘FALSE’ will leave the Vignette as an oval, defined by the dimensions of the viewers' screen.
Setting this parameter to ‘TRUE’ will force the centre of the Vignette into a circle, regardless of the dimensions of the viewers' screen.
Last updated
Was this helpful?

