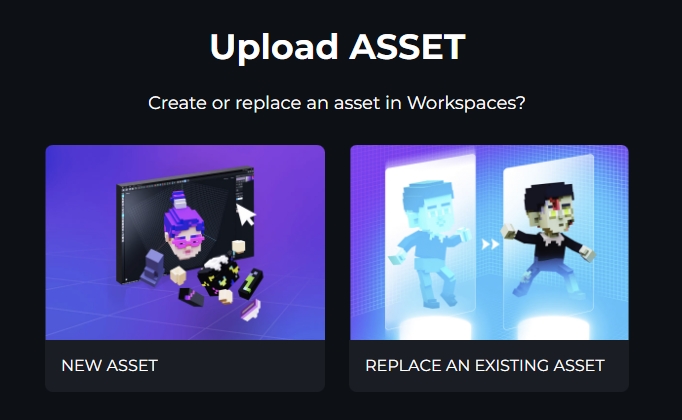
Upload assets from VoxEdit to your Workspace so you can prepare them for the Marketplace or discover them in your Game Maker library to build an Experience.
What is Workspaces?
Workspace is a location in your account on The Sandbox website that allows you to manage your assets. You can upload or replace your creations made in VoxEdit and find them in your Game Maker library for building Experiences using this workflow.
My Workspace
This is your Workspace home, here you will be able to see, access, and bulk manage your uploaded assets.
My Catalysts
The number and type of Catalyst NFTs you own appear here. Catalyst NFTs are burned to mint assets as NFTs and define their rarity.
Filters
Filters will help you have a better view of your assets and also perform several actions in bulk:
All
Select and mint several assets (Draft assets will not be added)
Select and transfer ownership of several assets (Draft assets will not be added)
Select and delete several assets (Draft assets will not be added)
Ready - Select and set several assets as Draft
Draft - Select and set several assets as Ready
Hidden - Select and set several assets as visible in your profile
Asset Status
A Workspace asset can have two different statuses: Ready or Draft
Ready is the default status after you finish uploading your asset (unless you selected Save as draft during the process).
I need to upload my asset to quickly test it in the Game Maker.
(Select Save as draft when uploading to Workspaces)
I need my asset to be private and only I can have access to it.
Asset Visibility
Even though a Ready asset is publicly visible by default, you have the option to hide it.
A Hidden asset is hidden from the accountโs public profile and searches, but it can still be seen, wishlisted, and used in the Game Maker by anyone who has the direct link to the assetโs public URL.
Ready and Hidden use cases:
I want to share my asset with specific users but I donโt want my asset to be found by anyone else.
I have a team where multiple accounts need access to the assets.
I need a private way to share the asset progress with my clients so they can test it.
Upload an Asset
Assets are uploaded by default as "not published." Once an asset is uploaded, from its page you can publish, hide, transfer ownership, or delete it using the dropdown menu beneath the asset image. You can also edit all of the custom information you created, which is noted in the step-by-step instructions below.
This process does not burn Catalyst NFTs. However, once an asset is uploaded, it can be minted using Catalysts and listed on the Marketplace.
Make sure your asset is optimised to be the best version possible. Reduce face count and nodes and use texture instead of voxels when possible. View Quality Guidelines and Creative Guides for resources to improve your assets.
From VoxEdit
Before you begin, log in to your into VoxEdit using the same login credentials for your account. With the asset you want to upload open:
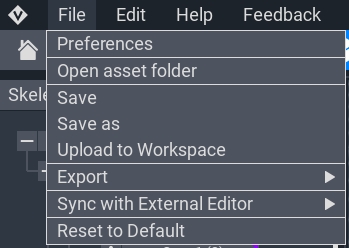
Open the File menu and click Upload to Workspace. For an animated asset, you can choose an animation to display and move the arrowhead to the right time for a pose you want displayed in your asset's thumbnail.
Multiple thumbnail options from different directions will be available to choose from. Select the thumbnail you want to display on your asset's page, select the default animation from the dropdown menu, and click Export. This will open a tab in your browser directly on The Sandbox website.
Select New Asset or Replace Existing Asset.
If you choose Replace Existing Asset:
A list of assets you have already uploaded to your Workspace will appear. This list is filtered by default to display unpublished assets. Select an asset to replace by clicking the radio button on the left of its thumbnail, which becomes green. Then click Replace.
Proceed through the following steps to add details that make your asset easier to find in search engines and on the Marketplace, pressing Continue after each step:
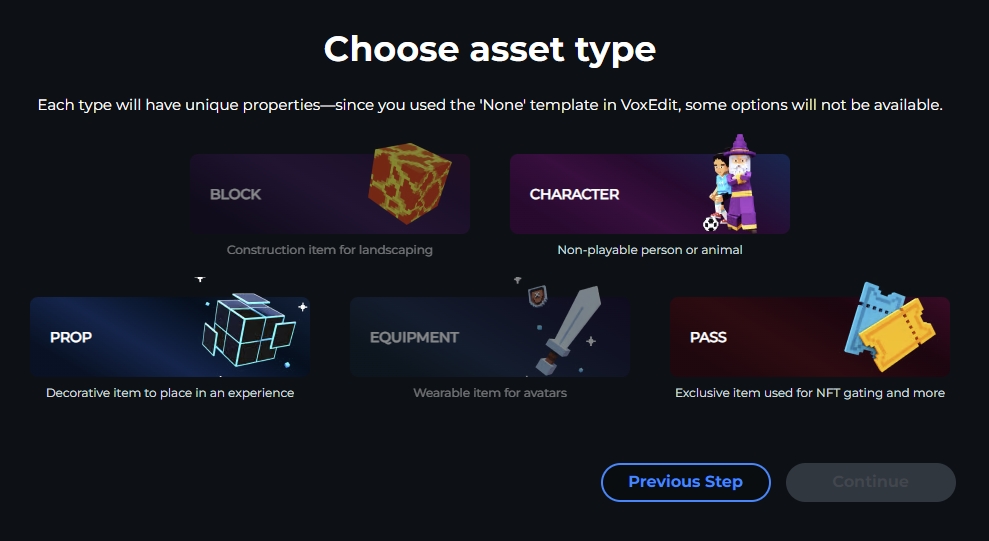
๐ฒ Choose asset type:
Character: Non-playable characters you can place in experiences
Block: Construction item for landscaping
Equipment: Wearable item for avatars
Prop: Decorative item to place in an experience
Pass: Exclusive item used for NFT gating and more
The potential options will automatically be detected based on the asset you've created.
๐ฒ Create a name (maximum 150 characters) and a description (maxiumum 500 characters).
Both name and description are automatically moderated to identify content such as violence, verbal abuse, etc. If a message appears indicating your name or description violate terms of use, please review the reason(s) listed and replace the content.
๐ฒ Select a category, sub-categories, and custom tags.
Define up to 10 custom tags to better categorize your asset. An auto completion feature will suggest relevant tags that have already been used by other creators. These tags will make it easier to find your creations using the new marketplace filters.
The Catalyst selected will determine the rarity of the asset. For equipment assets only, it will also grant a fixed amount of points to distribute between different attributes that will enhance your gameplay.
The team is working on a system in which Catalysts can add value to non-equipment assets, which still require a Catalyst to mint, but do not have Attribute Points.
If you are uploading a non-equipment asset (Character, Prop, Pass) this is the last step of the upload flow. You can skip to asset edit page after this step.
๐ฒ Set rarity by choosing a Catalyst and press Continue.
๐ฒ (For equipment assets only) Apply Attribute Points available from your chosen Catalyst and click Create Asset.
Assigning Attribute Points when creating a new equipment asset based on the rarity of the Catalyst
The Attribute will get a random value within a range, depending on the amount of points spent on it:
1 point spent: Random value between 1 and 25
2 points spent: Random value between 26 and 50
3 points spent: Random value between 51 and 75
4 points spent: Random value between 76 and 100
The final values will be defined when the asset is minted.
You will then see an editable page describing all of the characteristics you've added to your asset.
Press the three dots button below your asset's thumbnail to:
publish
set as private
transfer ownership
delete the asset
Click the pencil icon on the right side of any characteristic to make modifications.
You can modify assets you've created anytime in your Workspaceand via your Inventory.
Asset Edit Page
Click on any asset in your Inventory to open the asset edit page. There, you can edit all of the characteristics added to the asset in the upload process.
After the asset is minted, you will not be able to change this information.
Press the three dots button below your asset's thumbnail to change the asset status.
Click the pencil icon on the right side of any characteristic to make modifications.
You can modify assets you've created anytime in your Workspace.