> For the complete documentation index, see [llms.txt](https://docs.sandbox.game/jp/llms.txt). Markdown versions of documentation pages are available by appending `.md` to page URLs; this page is available as [Markdown](https://docs.sandbox.game/jp/creators/voxedit/dokyumento/animator/rig-animator-skeleton-and-viewport.md).

# Rig: Animator Skeleton & Viewport

Structure a hierarchy defining how the parts of your Asset will move and rotate in relation to each other during editing and when adding motion.

## What Are the Skeleton Panel and Viewport?

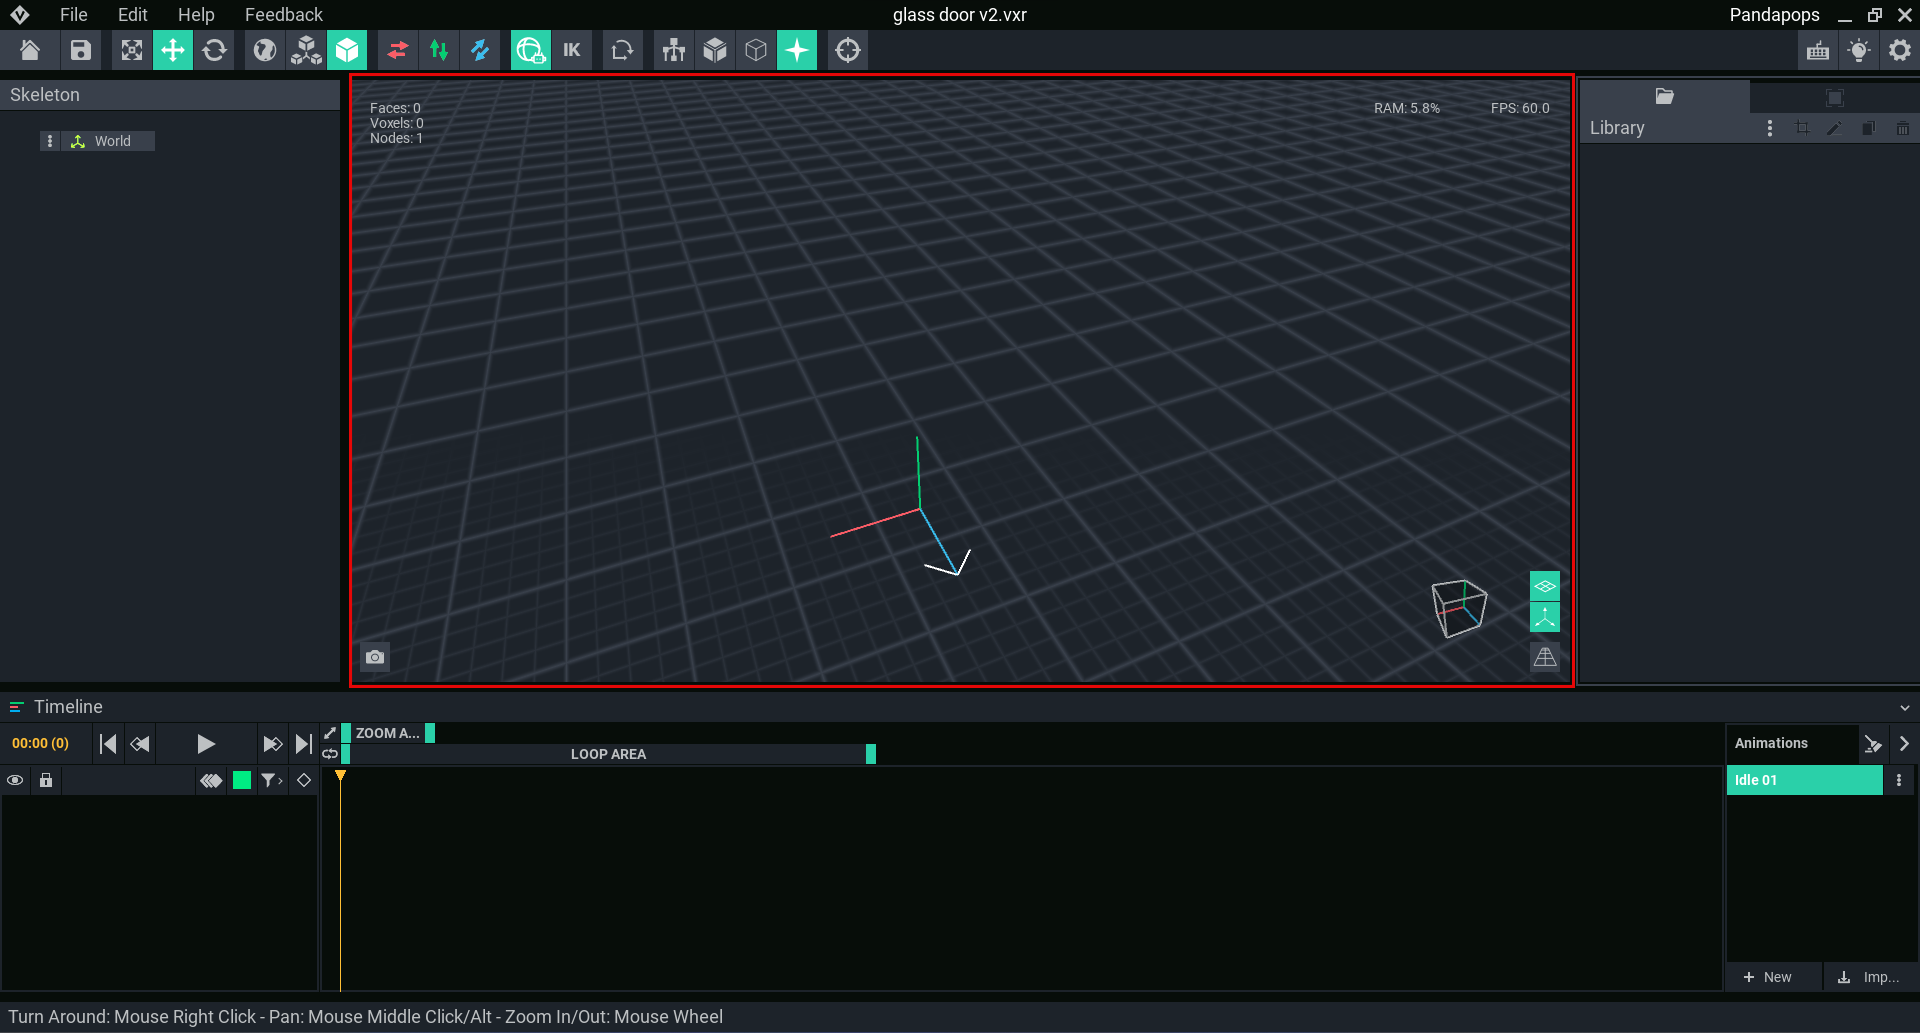

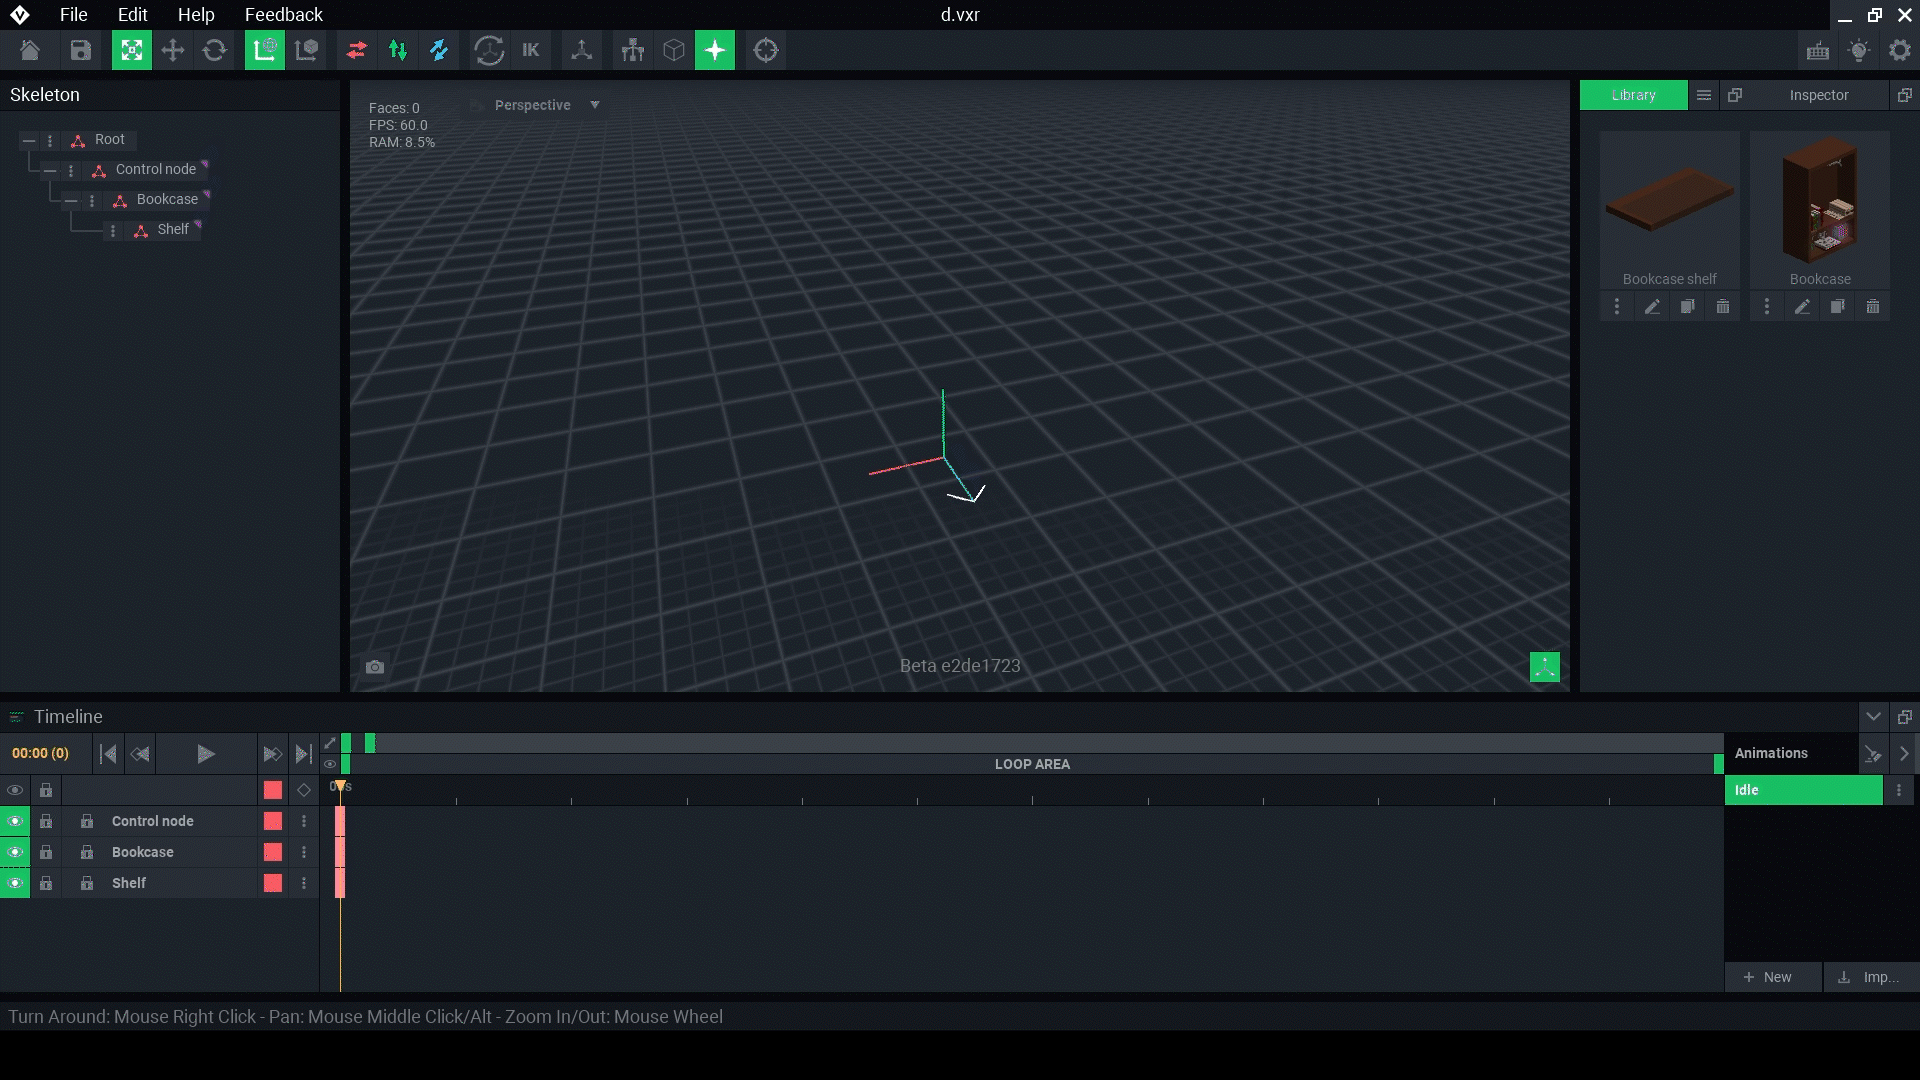
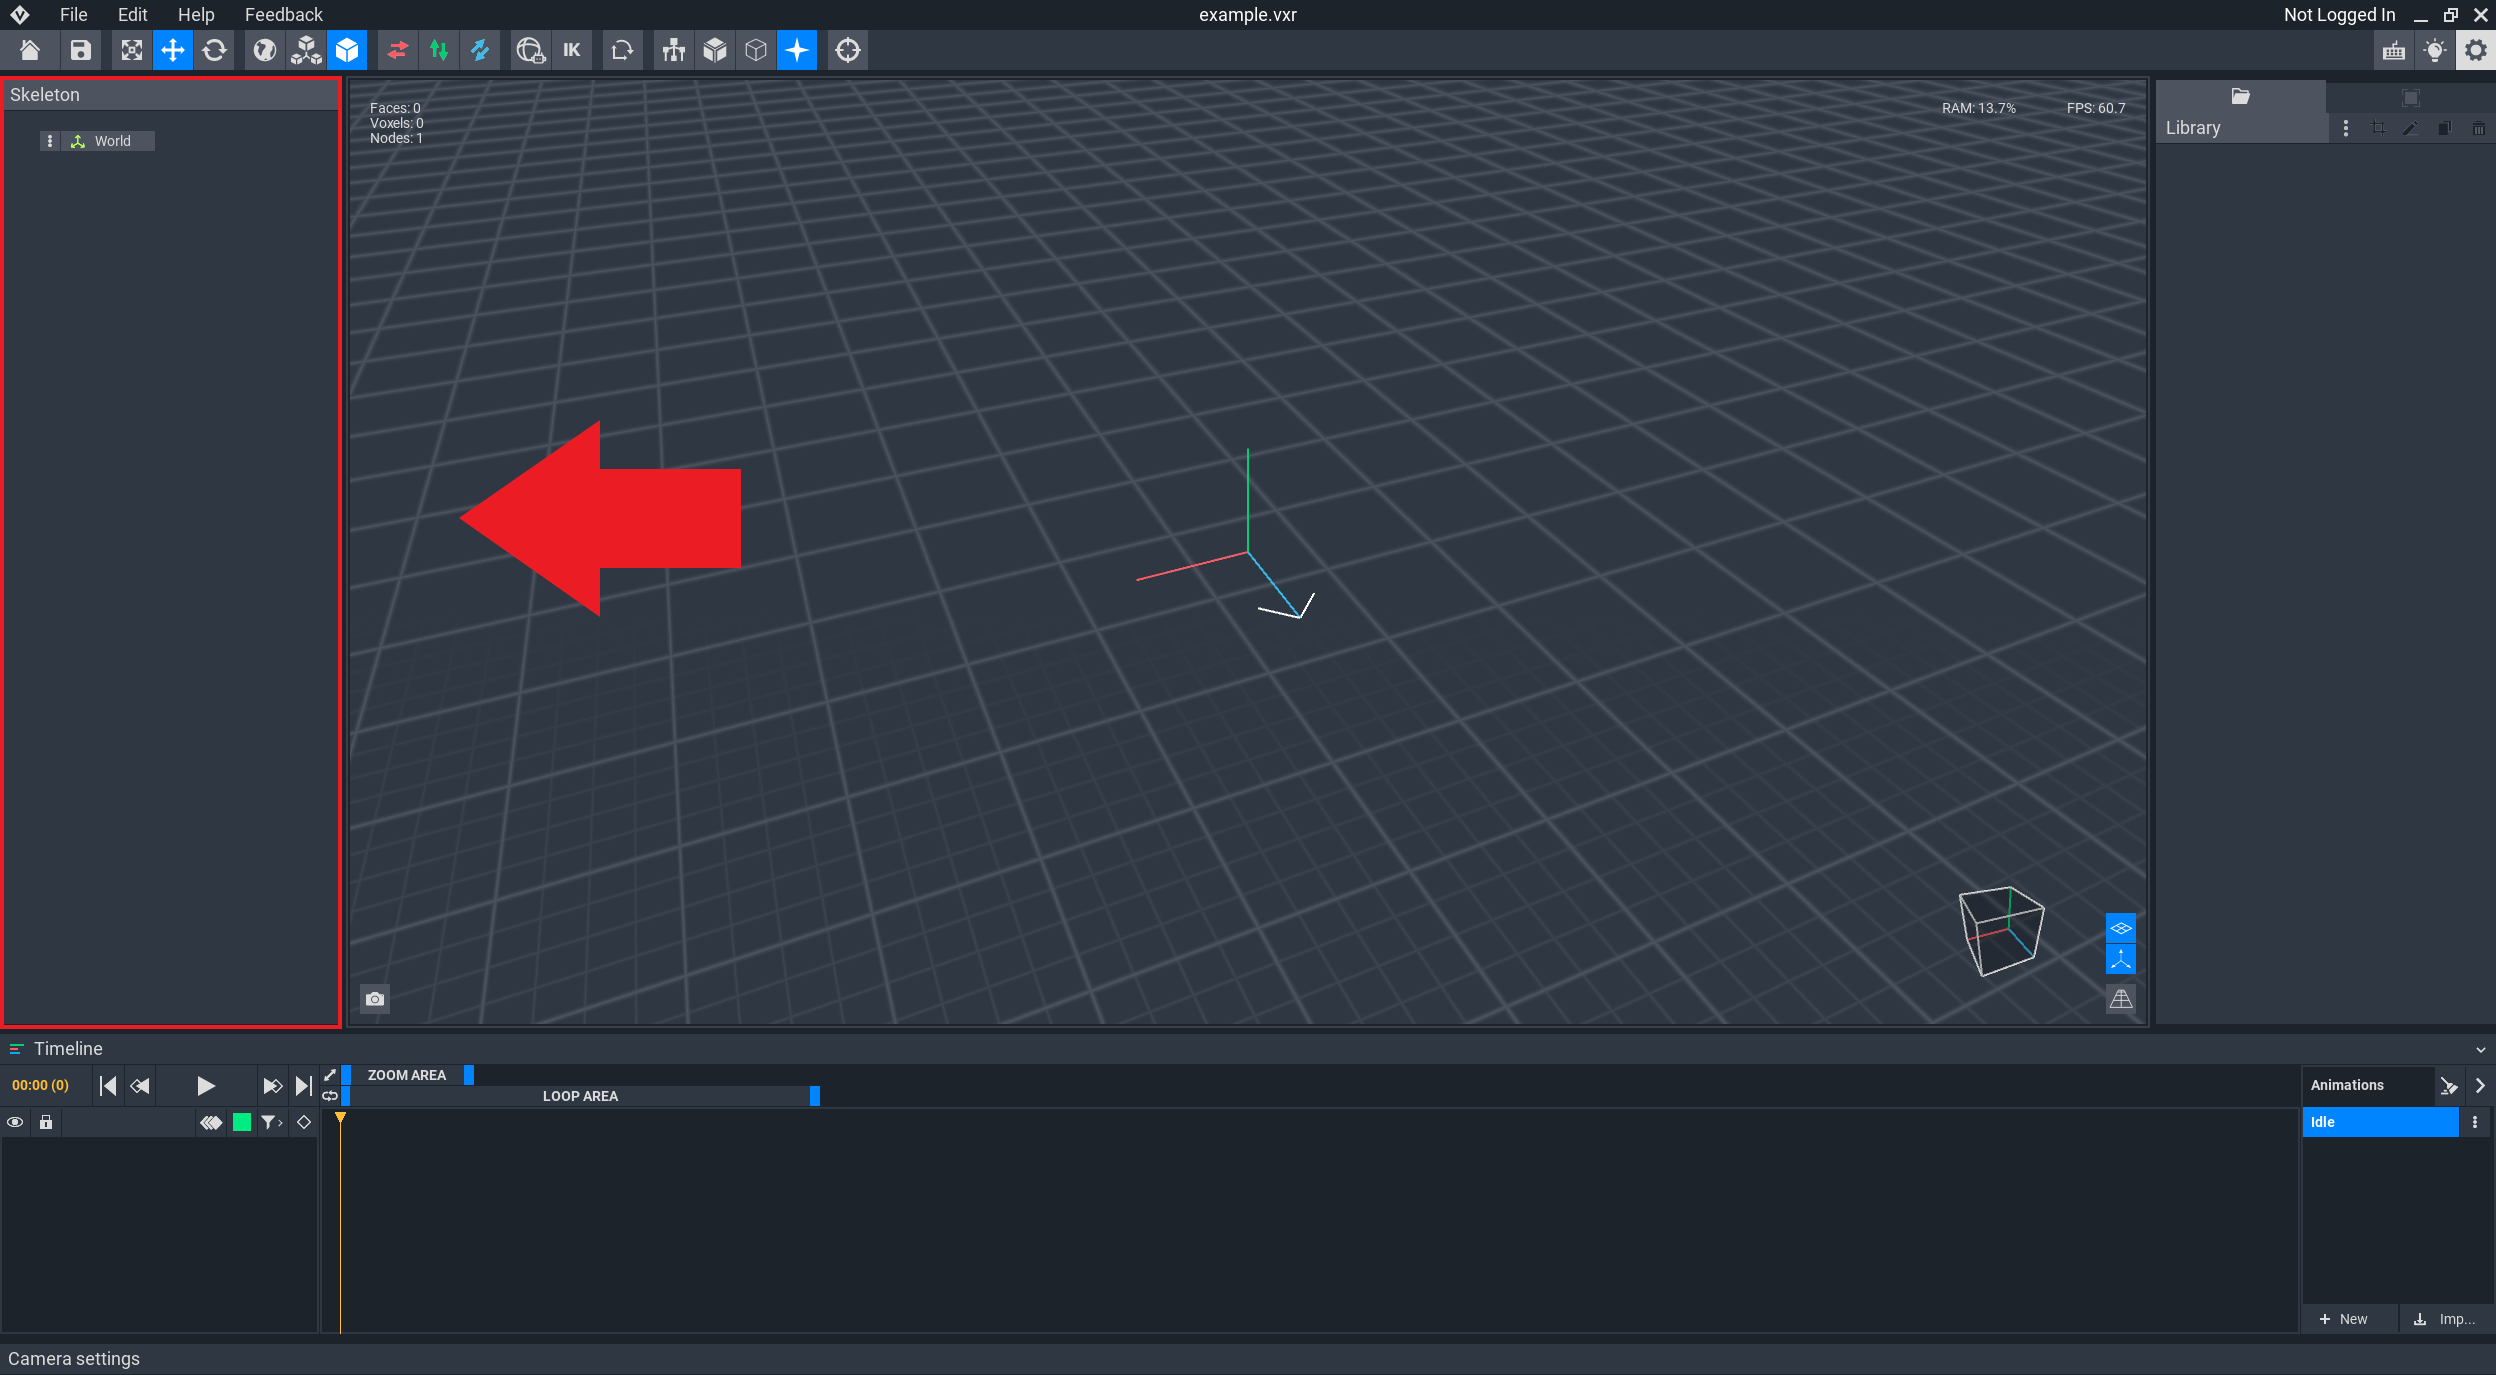
The Skeleton Panel displays the structure of your compound or animated asset's rig, while the viewport displays models linked to each part of the rig, called a node, and allows you to change the position and rotation of each model/node to pose your rig and create motion keyframes in animations.

<figure><img src="https://content.gitbook.com/content/V8pr5EgDZn2rnTUJE8XB/blobs/wFSPD6T6JVaKRj4KZxpF/voxedit%20animator%20skeleton%20panel%20update%2055b2e188.png" alt=""><figcaption><p>Skeleton Panel</p></figcaption></figure>

<figure><img src="https://content.gitbook.com/content/V8pr5EgDZn2rnTUJE8XB/blobs/FUQZEVR34HibBYmjhUb7/animator%20screen%20august%202023%20viewpoprt.png" alt=""><figcaption><p>Viewport</p></figcaption></figure>

## What is a Rig?

A <mark style="color:yellow;">**rig**</mark> is a combination of multiple models to shape a compound asset (static) or an animated asset and define how the models may move in relation to each other.

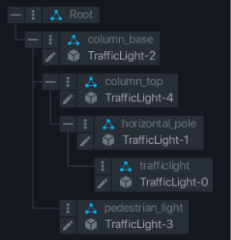
The relationships are set up in a hierarchy of parent and child <mark style="color:yellow;">**nodes**</mark> in the Skeleton Panel, where movement of the parent node determines the movement of its child nodes. A child node can also be a parent of other nodes, making it possible to rig and animate complex entities.

<table data-card-size="large" data-view="cards"><thead><tr><th data-card-target data-type="content-ref"></th><th></th></tr></thead><tbody><tr><td><a href="/jp/creators/voxedit/kegaido.md">初心者向けガイド</a></td><td>Tutorials &#x26; hands-on activities of VoxEdit basics, including rigging &#x26; animation</td></tr><tr><td><a href="/jp/creators/voxedit/dokyumento/animator/rig-animator-skeleton-and-viewport.md#building-a-rig">Rig: Animator Skeleton &amp; Viewport</a></td><td>Learn more about how models are broken down and rigged together</td></tr></tbody></table>

## Node Menus

First, let's look at how the skeleton panel displays node menus.

{% tabs %}
{% tab title="Expand and Collapse Nodes" %}

### Expand and Collapse

Click the plus sign ![](https://content.gitbook.com/content/V8pr5EgDZn2rnTUJE8XB/blobs/Xq8c9j3mqeOxvQwdgXff/image.png) to expand a Node and see all of its Child nodes. Child nodes will be indented with a bracket ![](https://content.gitbook.com/content/V8pr5EgDZn2rnTUJE8XB/blobs/Yvl3gfc9bMHwWZSF9NvU/image.png) to the left. To collapse a Node, click the minus sign ![](https://content.gitbook.com/content/V8pr5EgDZn2rnTUJE8XB/blobs/1J1onYJQMGP6t8LV9tRW/image.png). This hides them so it's easier to scroll through the Skeleton Panel.

**Examples:**

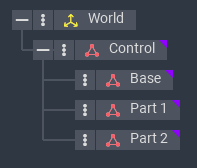
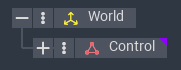
<table data-header-hidden><thead><tr><th width="257"></th><th></th></tr></thead><tbody><tr><td><img src="https://content.gitbook.com/content/V8pr5EgDZn2rnTUJE8XB/blobs/Bvd2kdjBPw4mOWfQTfJA/image.png" alt=""></td><td><ul><li>The World Node is a Parent of the Control Node.</li><li>The Control Node is a Parent of the Base, Part 1, and Part 2 nodes. The <img src="https://content.gitbook.com/content/V8pr5EgDZn2rnTUJE8XB/blobs/1J1onYJQMGP6t8LV9tRW/image.png" alt=""> sign indicates this Node is expanded.</li></ul><p></p></td></tr><tr><td><img src="https://content.gitbook.com/content/V8pr5EgDZn2rnTUJE8XB/blobs/OPTP6YV0HqZxMjTPKTCZ/image.png" alt=""></td><td><ul><li>The Control Node is collapsed. The <img src="https://content.gitbook.com/content/V8pr5EgDZn2rnTUJE8XB/blobs/Xq8c9j3mqeOxvQwdgXff/image.png" alt=""> plus sign indicates it has Child nodes.</li></ul></td></tr></tbody></table>
{% endtab %}

{% tab title="The Root Node" %}

### The Root Node

The Skeleton Panel for a new project includes a root node named 'World'.&#x20;

![](https://content.gitbook.com/content/V8pr5EgDZn2rnTUJE8XB/blobs/TOiW5lOLdlj01BBWE0hU/image.png)

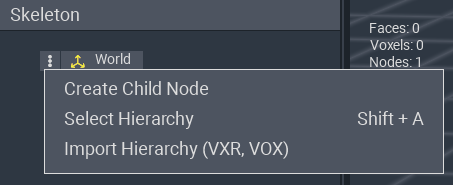
Click the ![](https://content.gitbook.com/content/V8pr5EgDZn2rnTUJE8XB/blobs/gr93TGTGu9tGmXMdtllH/image.png) button to the left on the 'World' Node to open a menu with options to:

* Create Child Node
* Select Hierarchy
* Import Hierarchy (VXR, VOX)

<div align="left"><figure><img src="https://content.gitbook.com/content/V8pr5EgDZn2rnTUJE8XB/blobs/x6ZazrByAwgz5SFKCUJ6/image.png" alt=""><figcaption></figcaption></figure></div>

### Avoid Root Motion

The "World" Node is the **Root**. It is recommended to **create a child node** that will control all of the nodes you'll add to your asset (name it something like "**Control**"). Then, build your rig on the control node.

{% hint style="warning" %}
**AVOID ANIMATING THE ROOT NODE**

The Sandbox's game engine manages an asset's motion. This is why adding motion to the root node of an asset to simulate its movement leads to an unnatural result when the asset is used in the game world.
{% endhint %}

**Example:**

In VoxEdit, an asset's walking animation should appear to be walking while staying in one location. When this asset is used in the game engine, the behaviour system will move the asset based on the player's use of controls, which will look natural with the animation.

{% hint style="info" %}
**GAMING HISTORY: SPRITES**

2D games used sprites composed of multiple still images replaced in sequence at a certain speed to animate the actions of a player, enemies, objects, etc. The game's code determined the location of sprites.

The Sandbox's assets and game engine are similar, except you can build a 3D rig of voxel models with fluid motion in your animations.
{% endhint %}
{% endtab %}

{% tab title="All Other Nodes" %}

### Other Nodes

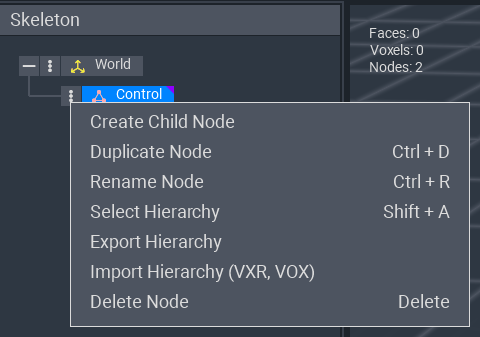
Clicking the ![](https://content.gitbook.com/content/V8pr5EgDZn2rnTUJE8XB/blobs/gr93TGTGu9tGmXMdtllH/image.png) button on any other Node you create reveals a full list of options to:

* Create Child Node
* Duplicate Node (CTRL + D)
* Rename Node (CTRL + R)
* Select Hierarchy (SHIFT + A)
* Export Hierarchy
* Import Hierarchy (VXR and VOX formats)
* Delete Node (Delete)

<div align="left"><figure><img src="https://content.gitbook.com/content/V8pr5EgDZn2rnTUJE8XB/blobs/UL5y7DKdlLqEEtHxRDgR/image.png" alt="" width="360"><figcaption></figcaption></figure></div>
{% endtab %}
{% endtabs %}

## Parent and Child Relationships

{% tabs %}
{% tab title="About Child Nodes" %}

### Child Node

A child node is attached to a parent node within the skeleton hierarchy. This empty node controls the location of any attached model relative to the position of the parent node.

#### Bounding Box

When you create a new node, it will display as an empty bounding box of 32x32x32 (if bounding boxes view enabled) until a model is linked. Then the bounding box will match the model linked to the node.

#### Motion

If the position of the parent node is adjusted, the child node will follow. However, the child node can be moved independently of the Parent.

The exception is when [**Inverse Kinematics**](/jp/creators/voxedit/dokyumento/animator/animator-top-bar.md#what-is-inverse-kinematics) is togged on in the Top Bar, where the child node can be positioned and its parent (as well as its parent, and so on) will follow, which helps when it's more natural to position the child node at the end of chain of influence created from a hierarchy with multiple levels.
{% endtab %}

{% tab title="3D Movement Example" %}

### &#x20;3D Movement Example

When a Child node is moved or rotated in the viewport, the Child node moves independently and the Parent node stays in the same location.

When a Parent node is moved or rotated in the Viewport, the Child node will follow to maintain its relationship with the Parent.

#### Example: Moving a Parent Node and Its Children

<figure><img src="https://content.gitbook.com/content/V8pr5EgDZn2rnTUJE8XB/blobs/xVdMWiFEYuq0DpYN9vuO/move%20parent%20and%20child%20nodes.webp" alt=""><figcaption></figcaption></figure>

#### Example: Rotating a Parent Node and Its Children

<figure><img src="https://content.gitbook.com/content/V8pr5EgDZn2rnTUJE8XB/blobs/43k7d80g74NFKkthyAUG/rotate%20parent%20and%20child%20nodes.webp" alt=""><figcaption></figcaption></figure>
{% endtab %}

{% tab title="Uses & Viewing" %}

### Parent and Child Node Uses

Creating parent and child relationships between nodes can be useful for:

* keeping nodes organised in groups for easier management of complex rigs with multiple main parts, such as a bookshelf and the items placed on it
* building smooth, curved shapes using multiple models, such as a wheel or arch
* creating motion where some nodes naturally follow others, such as the parts of an arm

### **View Relationships**

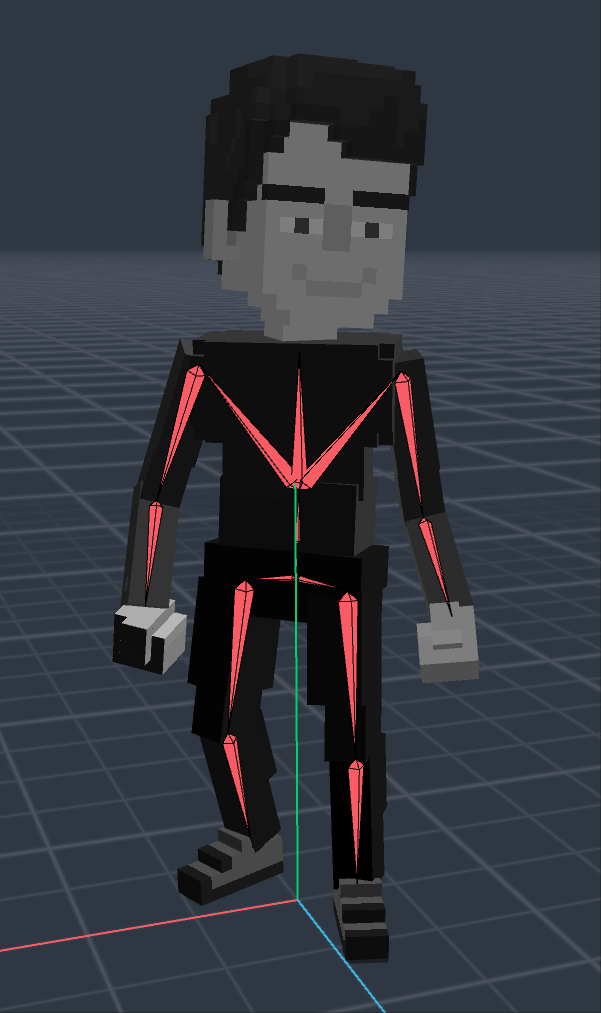
Using the ![](https://content.gitbook.com/content/V8pr5EgDZn2rnTUJE8XB/blobs/UUnoZOwQ05MSZ94J38IQ/image.png) button in the Top Bar, the rig's skeleton visibility can be toggled on/off.

<div><figure><img src="https://content.gitbook.com/content/V8pr5EgDZn2rnTUJE8XB/blobs/X95O7ayAWrKYby0fPPoY/image.png" alt="" width="150"><figcaption><p>Normal View</p></figcaption></figure> <figure><img src="https://content.gitbook.com/content/V8pr5EgDZn2rnTUJE8XB/blobs/vbeZ762Up9712SutjcVs/image.png" alt="" width="150"><figcaption><p>The Skeleton of the Rig</p></figcaption></figure></div>

The image on the left shows the asset's appearance, with models linked to the rig's nodes.&#x20;

The image on the right shows the asset's skeleton, with red lines that are thick at a connection with a Parent node and thin at a connection with a Child node.

{% hint style="info" %}
**PARENT/CHILD SIMILARITIES IN VOXEDIT & GAME MAKER**\
The Parent and Child relationships defined in the Skeleton Panel of VoxEdit are similar to the Parent and Child relationships of Objects defined in Game Maker's Hierarchy Panel. In both software, the Parent's motion determines the Child's motion.
{% endhint %}
{% endtab %}
{% endtabs %}

## Managing Nodes

{% tabs %}
{% tab title="Create" %}

### Add a Child Node

Click on the three dots button to the left of the node you wish to add a child node to and choose "Create Child Node" from the menu.&#x20;

There will then be a prompt asking for the "Name of new Node." Type your preferred name and press the ENTER key.

You can use this same process on the newly created node to give it a child node of its own. This creates a chain of influence where the newly created child will treat the previously created child node as its parent, but will also follow the influence of the parent of its parent node.

![](https://content.gitbook.com/content/V8pr5EgDZn2rnTUJE8XB/blobs/Iqs2euTjYnB3Q32uCXKV/image.png)

{% hint style="info" %}
Try to create and use a clear naming convention for new nodes and models.
{% endhint %}
{% endtab %}

{% tab title="Duplicate" %}

### Duplicate Node

Duplicating a node can be helpful for repetitive parts of your entity's design. This action will add a copy of the same node and all of its sub-nodes in the same hierarchal arrangement to the rig, and its location will be identical to the node it copied (it will also be a child of the original's parent). This copy will include the same linked models.

Click on the three dots button to the left of the node you wish to duplicate and choose "Duplicate Node" from the menu.&#x20;
{% endtab %}

{% tab title="Rename" %}

### Rename Node

Click on the three dots button to the left of the node you wish to rename and choose "Rename Node" from the menu.&#x20;

A window will appear allowing you to rename. Avoid using special characters, and remember every node must have a unique name. Develop a system for naming nodes based on the structure for complex entities so it's easy to find what you need.
{% endtab %}

{% tab title="Delete" %}

### Deleting a Node

Any node (excluding the Root Node) can be deleted by clicking on the three dots next to the nodes name and then choosing "Delete Node" in the menu.&#x20;

Be aware that all the sub-nodes further down the chain of influence treat that node as a parent, so they will also be deleted. This removes the models linked to them from the Viewport, but they are still located in your Library so you can continue to use them in your entity.
{% endtab %}

{% tab title="Change Parent" %}

## Change Parent and Child Relationships

Click a **Node in the Hierarchy** that will be a **Child Node** and then drag and drop it **on top** **of** another Node in the list that will be its **Parent**. A bracket will be seen next to the Child Node and the relationship will be visible in the Skeleton Panel:

&#x20;**Parent Node** - the left most object

&#x20;**Child Node** - indented to the right under its parent

If the node you choose to drag and drop has child nodes, they will move with it.

To reverse this, drag and drop the Child Node back below a different Node as its Parent.

A Child Node may also be a Parent of other Nodes. It will still keep the same child bracket, and its Child Object will be indented to the right with a bracket.
{% endtab %}
{% endtabs %}

## Link & Unlink Models

{% tabs %}
{% tab title="Add a Model" %}

### Add or Link a Model

A model can be quickly and easily added to a node in the skeleton hierarchy by dragging and dropping a .VXM model file from the Library onto an existing node.&#x20;

<img src="https://content.gitbook.com/content/V8pr5EgDZn2rnTUJE8XB/blobs/3JQzcFQt5SAg0AZqKb3w/image.png" alt="" data-size="original">
{% endtab %}

{% tab title="Remove a Model" %}

### Remove or Unlink a Model

You can remove the current .VXM model file from a node by left-clicking the three dots to the left of the nodes name in the hierarchy and navigating to 'Unlink VXM from Node'.
<figure><img src="https://content.gitbook.com/content/V8pr5EgDZn2rnTUJE8XB/blobs/muKDGyjggDCWkqGtaNOh/Unlink%20node.gif" alt=""><figcaption></figcaption></figure>
{% endtab %}
{% endtabs %}

## Managing Hierarchies of Nodes

{% tabs %}
{% tab title="Select Hierarchy" %}

### Select Hierarchy

Click on the three dots button to the left of the node you wish to select and choose "Select Hierarchy" from the menu. You'll see all sub-nodes in the hierarchy selected in the Viewport for editing.
{% endtab %}

{% tab title="Export Hierarchy" %}

### Export Hierarchy

Exporting a hierarchy can save time when you will use a hierarchy of nodes, its models, and their motion keyframes again in another project.&#x20;

Click on the three dots button to the left of the node you wish to export and choose "Export Hierarchy" from the menu. The window will prompt you to name it and save it in your folders so you can reuse it later.
{% endtab %}

{% tab title="Import Hierarchy" %}

### Import Hierarchy

Importing a hierarchy can save time when you will use a hierarchy of nodes, its models, and their motion keyframes that you've saved again in the current project. It's how templates are "[**unlocked**](/jp/creators/voxedit/dokyumento/templates.md#advanced-unlock-a-template)."

Example Use Case:

You've created an excellent animation with multiple models for a flickering candle flame and want to reuse it on other entities with similar flames.

Click on the three dots button to the left of the node you wish to import to and choose "Import Hierarchy" from the menu. The window will prompt you to select a saved hierarchy to import.
{% endtab %}
{% endtabs %}

## Building a Rig

{% tabs %}
{% tab title="About" %}

<div><figure><img src="https://content.gitbook.com/content/V8pr5EgDZn2rnTUJE8XB/blobs/D4aXTS7DokmVscwv5LTO/image.png" alt=""><figcaption><p>Static Compound Entity</p></figcaption></figure> <figure><img src="https://content.gitbook.com/content/V8pr5EgDZn2rnTUJE8XB/blobs/DoESbk5aKPc32qXCOocL/image.png" alt=""><figcaption><p>Skeleton Panel showing the rig</p></figcaption></figure></div>

1. To create a rig, first you must first decide the shape of your whole entity.
2. Then you will break it down into smaller parts, or models, based on the necessary structure, whether it is static or animated.
3. To move these parts, <mark style="color:yellow;">**nodes**</mark> must be added in the Skeleton Panel in a hierarchy of parent and child relationships.

{% hint style="info" %}
Nodes are sometimes called the "bones" of the "skeleton."
{% endhint %}

3. Models are linked to each node with a simple drag and drop from the Library to the node. Then they are positioned by selecting tools in the Top Bar and adjusting in the Viewport. Be sure the pivot point for each model is positioned correctly for the expected motion.

**Example:**

The pivot point on the lid of a chest should be on the back where the hinges would be.

4. You can create multiple animation states in the Timeline panel, which are poses of your rig's nodes/models. For each animation state, you can add motion keyframes to make the nodes/models move.
   {% endtab %}

{% tab title="A Rig & Its Parts" %}
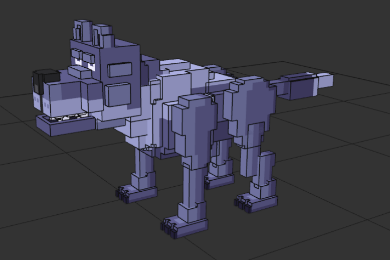
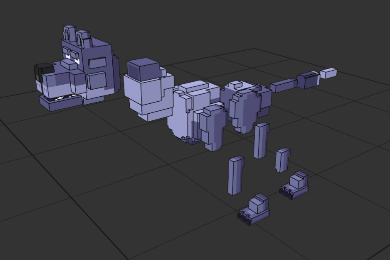
The entity below is one of many VoxEdit [テンプレート](/jp/creators/voxedit/dokyumento/templates.md), broken down into its models. The joints on a real animal help visualise all of its parts, which will become separate models. The joints also help visualise where the pivot point on each model should be, knowing how a model should move and rotate.

<div><figure><img src="https://content.gitbook.com/content/V8pr5EgDZn2rnTUJE8XB/blobs/Y5S6F2uBdskqhgM1qbyy/image.png" alt=""><figcaption><p>This image shows multiple models combined in the rig</p></figcaption></figure> <figure><img src="https://content.gitbook.com/content/V8pr5EgDZn2rnTUJE8XB/blobs/52g1eTj6vvJMkgFBNffu/image.png" alt=""><figcaption><p>This image shows all models in the rig separated</p></figcaption></figure></div>

To simulate the movements of a dog or wolf, an entity would need parts such as:

<table data-view="cards"><thead><tr><th></th></tr></thead><tbody><tr><td><p><strong>BODY CENTRE</strong></p><ul><li>Torso</li><li>Pelvis</li></ul></td></tr><tr><td><p><strong>HEAD</strong></p><ul><li>Neck</li><li>Head</li></ul><p></p></td></tr><tr><td><p><strong>TAIL</strong></p><ul><li>Tail01</li><li>Tail02</li><li>Tail03</li></ul></td></tr><tr><td><p><strong>FRONT LEGS</strong></p><ul><li>FrontLeg01</li><li>FrontLeg02</li><li>FrontFoot</li></ul></td></tr><tr><td><p><strong>BACK LEGS</strong></p><ul><li>BackLeg01</li><li>BackLeg02</li><li>BackLeg03</li><li>BackFoot</li></ul></td></tr></tbody></table>

The torso and pelvis are the center of the animal's body, so they should be parents of all other nodes. The Head and Front Legs are attached at the Torso and the Tail and Back Legs are attached at the Pelvis.

Except for the Body Centre group above, think of each of the other groups above as a chain of child nodes (and remember you'll need a chain for each front and back back leg, as well as the tail). There are a lot of nodes to add for this rig, but breaking it down like this makes it easier to get started.
{% endtab %}

{% tab title="The Skeleton" %}
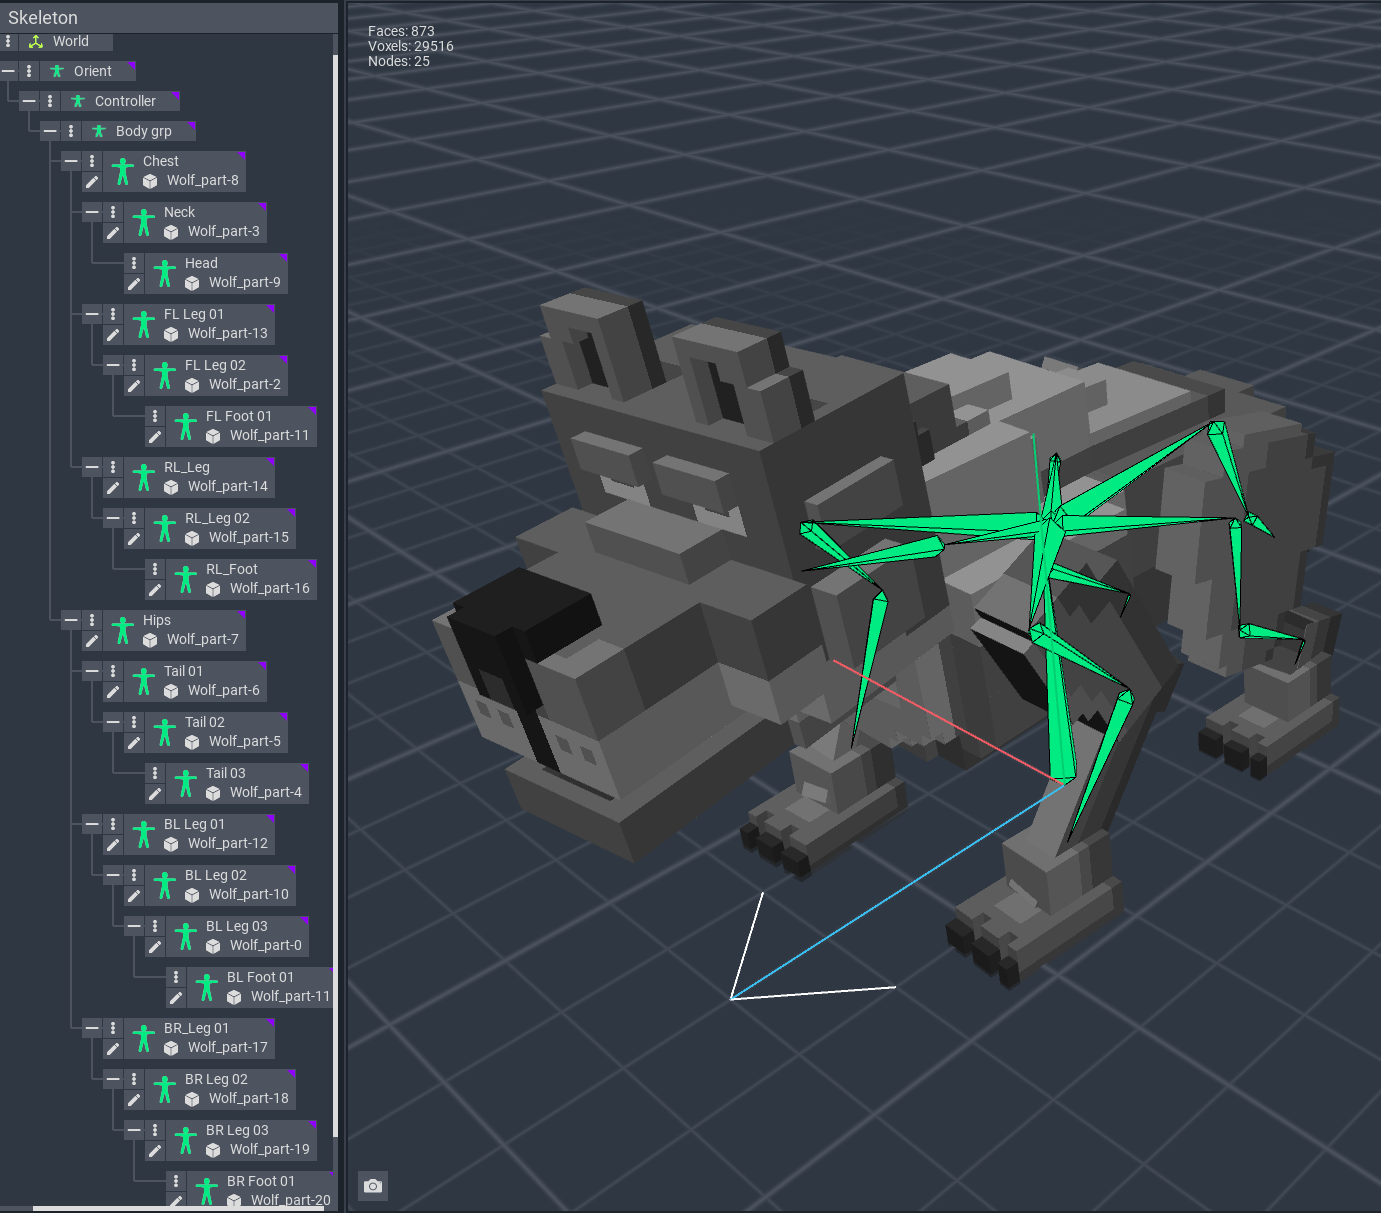
The Skeleton Panel shows the hierarchy of nodes, and the Viewport shows the models linked to the nodes. In the template example below, you can see a cascading chain of child nodes for each leg, the tail, and the head and neck.

In the image below, the skeleton is toggled on in the Viewport so you can see how the models are all connected as a hierarchy in the rig.

<figure><img src="https://content.gitbook.com/content/V8pr5EgDZn2rnTUJE8XB/blobs/k9Qnuo5PSJQUTKtpG3PF/image.png" alt=""><figcaption><p>The hierarchy and skeleton are visible to show how the models are all connected.</p></figcaption></figure>
{% endtab %}

{% tab title="Learn Skills to Build a Rig" %}
{% hint style="success" %}
**PRIOR KNOWLEDGE TO BUILD A RIG**\
Visit the [初心者向けガイド](/jp/creators/voxedit/kegaido.md) page for activities which gradually develop your skills:<br>

[/pages/MGU5Zs62su7XkD78bj1W#id-1.-create-a-block-paint-only](https://docs.sandbox.game/jp/creators/voxedit/dokyumento/animator/pages/MGU5Zs62su7XkD78bj1W#id-1.-create-a-block-paint-only "mention") introduces adjusting VoxEdit's camera to view your project and using basic editing tools in paint mode, which are also used in the Modeler.

[/pages/MGU5Zs62su7XkD78bj1W#id-2.-create-a-model-basic-tools](https://docs.sandbox.game/jp/creators/voxedit/dokyumento/animator/pages/MGU5Zs62su7XkD78bj1W#id-2.-create-a-model-basic-tools "mention") guides you to create and modify a model in the Modeler.<br>

[/pages/MGU5Zs62su7XkD78bj1W#id-3.-customise-a-template-animator](https://docs.sandbox.game/jp/creators/voxedit/dokyumento/animator/pages/MGU5Zs62su7XkD78bj1W#id-3.-customise-a-template-animator "mention") introduces the Animator. You'll learn to locate a node in the Animator Skeleton Panel, open its linked model seamlessly in the Modeler and edit, save, and return to the rig in the Animator.\ <br>

[/pages/MGU5Zs62su7XkD78bj1W#id-4.-build-a-rig-animator](https://docs.sandbox.game/jp/creators/voxedit/dokyumento/animator/pages/MGU5Zs62su7XkD78bj1W#id-4.-build-a-rig-animator "mention") is the main activity you'll need to rig a static compound entity (no motion). The activity includes adding and removing nodes in the Skeleton Panel, adding a model in the Library, linking models to nodes, and positioning nodes.<br>

**NEXT STEP - ANIMATION**

[/pages/MGU5Zs62su7XkD78bj1W#id-5.-create-animations-add-motion-keyframes](https://docs.sandbox.game/jp/creators/voxedit/dokyumento/animator/pages/MGU5Zs62su7XkD78bj1W#id-5.-create-animations-add-motion-keyframes "mention") continues the example from activity 4 and explains how to create multiple animations and motion keyframes for an animated entity.
{% endhint %}
{% endtab %}
{% endtabs %}